J
Free UK delivery on orders over £40
Product Registration
Products
See our latest offers
Offers & Promotions
Exclusive Gift: Free with Cooking Chef
Find out more
Recipes
Cakes and Party Food
Raspberry and White Chocolate Cakes
Support
Support
Inspiration
See our latest offers
Offers & Promotions
Guide to Food Mixers
Top Offers
Search on our website
Product Registration
Instruction Manuals
Login
New user?
Register now
Profile
Orders
Address Book
Registered Products
Products
Recipes
Support
Inspiration
Top Offers
Login/Register
Wishlist
Products
View All Products
Kitchen Machines and Stand Mixers
Food Processors
Hand Blenders
Blenders & Drinks Makers
Hand Mixers
Kettles & Toasters
Small Appliances
Cooking Machines
Collections
Attachments
Kitchen Machines and Stand Mixers
View All Stand Mixers
Cooking Chef
Chef Series
kMix Stand Mixers
Go Mixers - NEW
Prospero+
Mixers
Explore Attachments
All Attachments
Chef Attachments
Pasta Attachments
kMix Attachments
Prospero Attachments
Food Processors
View All Food Processors
Food Processors
Mini Choppers
Hand Blenders
View All Hand Blenders
Triblade Hand Blenders
Blenders & Drinks Makers
View All Blenders, Soup and Drinks Makers
Blenders
Soup Makers
Smoothie Makers
Citrus Juicers
Hand Mixers
Hand Mixers
Chefette
Kettles & Toasters
View All Kettle & Toaster Sets
Kettles
Toasters
Small Appliances
View All Small Appliances
Electric Knives
Can Openers
Meat Grinders
Cooking Machines
View All Cooking Machines
kHealthy Fry Air Fyer
Soup Makers
Collections
View All Collections
Abbey Collection
Elegancy Collection
Dawn Collection
Dusk Collection
Go Collection
NEW
Attachments
View All Attachments
All Attachments
Chef Attachments
Pasta Attachments
kMix Attachments
Prospero Attachments
Recipes
View All Recipes
Recipes by Course.
Meet the Chefs
Bread Recipes
Party Food Recipes
Vegan Recipes
Pancake Recipes - Sweet and Savoury
Show Easter Recipes
Recipes by Course.
View all Recipe Courses
Starter Recipes
Main Recipes
Dessert Recipes
Meet the Chefs
Bread Recipes
Party Food Recipes
Vegan Recipes
Pancake Recipes - Sweet and Savoury
Show Easter Recipes
Support
FAQs
Manuals
Contact Us
Safety information
FAQs
Manuals
Contact Us
Safety information
Inspiration
New! MultiPro Touch
Food news
In The Kitchen
Summer drinks & smoothies recipes
The history of Kenwood
Kenwood Can
Sustainability
New! MultiPro Touch
Food news
In The Kitchen
Summer drinks & smoothies recipes
The history of Kenwood
Kenwood Can
Sustainability
Top Offers
Top Savings
Top Savings
Royal Icing
Makes:
450g (1lb)
Course:
Dessert
Machine:
Mixer
Total time (min.):
15 plus standing time
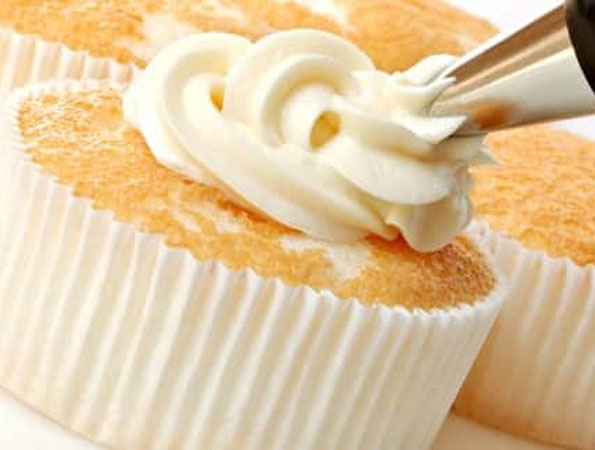
Royal icing can be used to decorate cakes, biscuits, cupcakes and more.
Ingredients
2 egg whites
450g (1lb) icing sugar, sifted
5ml (1 tsp) glycerine
Tools
K beater
Method
Place the egg whites in the Kenwood Bowl. With the K Beater running at minimum speed, gradually add the icing sugar, a little at a time.
Continue adding the icing sugar until the mixture is stiff and stands in soft peaks, suitable for coating a cake. If required for piping add a little more icing sugar as the icing should be slightly stiffer.
Add the glycerine to keep the icing from becoming hard. If it is required to cover a tiered cake a hard surface is needed to support the tiers so omit the glycerine.
Transfer to an airtight container, to prevent the icing drying out, until it is required. Leave to stand for a few hours to allow any air bubbles to rise to the surface.
Quantities guide for royal icing:
15cm (6 inch) round or 12cm (5 inch) square cake - 450g (1lb) royal icing.
18cm (7 inch) round or 15cm (6 inch) square cake - 550g (1½lb) royal icing
20cm (8 inch) round or 18cm (7 inch) square cake - 700g (1½lb) royal icing
25cm (10 inch) round or 23cm (9 inch) square cake - 1kg (2½lb) royal icing
30cm (12 inch) round or 28cm (11 inch) square cake - 1.4kg (3lb) royal icing
For Peaked ‘Snow’ Icing:
Make sure the icing is stiff enough to pull into well formed peaks with the back of a spoon. Spread the icing all over the cake and then create the peaks with a spoon. Leave for 24 hours to dry.
To Flat Ice a Cake:
Apply on top of almond paste. Spoon almost half the icing on top of the cake and spread it evenly with a palette knife, using a paddling motion to help remove any air bubbles.
Draw an icing ruler at an angle of about 30° across the top of the cake applying light, even pressure. Remove any surplus icing. If possible leave to dry for 24 hours.
To ice the sides, place the cake on an icing table. Spread the icing on the sides and smooth roughly with a small palette knife. Hold a cake scraper or palette knife at an angle of 45° and draw it towards you around the cake to smooth the surface.
For a square cake apply each side separately. Neaten the edges with a palette knife and leave to dry for 24 hours.
For a really smooth finish apply a second thinner coat. Use fine sand paper to rub and smooth down any imperfections before re-coating. Brush off any loose icing with a clean pastry brush.
Home
>
Recipes
Your account is almost ready
J
J
J