Country preference? Choose the preferred country to view local content and get a better experience.

Free UK delivery on orders over £50

Robin Christmas Tree Decoration Biscuits by Juliet Sear

Makes: 20-24 biscuitsCourse: DessertOccasion: ChristmasCategory: Biscuits & Cookies Machine: Mixer, Stand mixerChef: Juliet SearTotal time (min.): 110
robin-christmas-tree-decoration-biscuits.png robin-christmas-tree-decoration-biscuits.png

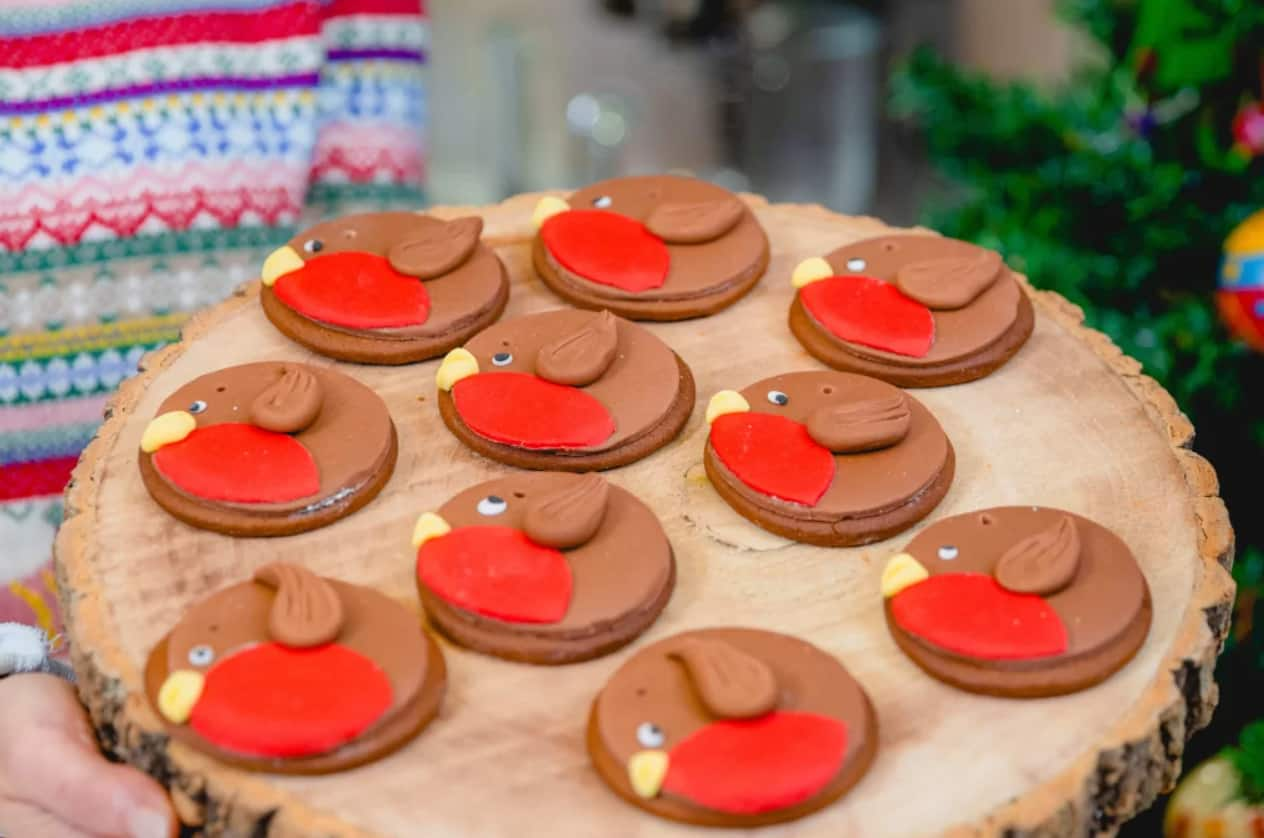
These cute and tasty biscuits look adorable on the tree or as hanging decorations around the house they are so jolly! They also make lovely gifts.

Ingredients

For the biscuits:

To decorate:

Tools

Method

For the biscuits:

  1. Mix the golden syrup, orange juice, sugar, spices and vanilla in a pan. Heat, stirring regularly, over a medium-low heat until all the sugar is dissolved and everything is combined – don’t let the mixture boil. Add the butter and stir until melted and incorporated into the hot sugar mix.
  2. Add the bicarb and whisk until fluffy and pale. Pour into the stand mixer or large mixing bowl. Allow to cool slightly, then add the flour and beat on slow, or mix with a wooden spoon until the mixture comes together and resembles a shiny dough – it should be gloopy and pliable but will harden as it cools and sets.
  3. Using a spatula, tip the dough onto two large pieces of cling film laid out in a cross, one on top of the other. Wrap up to seal, then chill in the fridge for at least two hours or overnight. The dough can be made ahead of time at this stage and frozen for up to a month. Defrost in the fridge overnight, then leave at room temperature for 1 hr before kneading until pliable.
  4. Heat oven to 180/160C fan/gas 4 and line a couple of baking trays with baking parchment. Roll out the dough on a lightly floured surface to a thickness of around 3/4 cm. Using a round cutter with a diameter of 6-7cm, stamp out little rounds and transfer them to the trays, leaving a 1cm gap between each one. Bake for about 12 mins, then carefully remove from the oven and cut a little hole in the top, leaving a few mm from the edge, the best way to do this is to insert a straw into the dough. The dough stays in the straw when you pull it out, trim the straw with scissors every few holes as it gets bunged up with the dough.
  5. Pop back into the oven and bake for a further 5 mins or so until very firm and darkened around the edge. For tree hangers, it's a good idea to bake them well so they're very dry to stop them from breaking. Transfer to a wire rack and leave to cool.

To decorate:

  1. Warm a tbsp of apricot jam or golden syrup and mix with a little hot water to loosen.
  2. Brush each cookie with the jam/syrup to aid sticking, keep the brush to hand if you need to stick the red breast/wing/beak/eyes.
  3. Roll out the brown fondant icing with a little icing sugar to a thickness of 2mm. Use the same round cutter as before to punch out little circles, then stick them to the cookies.
  4. Using a cocktail stick, push through the hole we made earlier from the back to remove the fondant icing from it.
  5. Roll out the red icing and use the large cutter again to make rounds, but then, using the smaller cutter, cut against the circle to make the little red breast shape. Attach to the brown circle on the bottom left or right subject to what direction you are facing them. Sugarpaste usually sticks to itself, but if you need to add a little more sticking power, use the pastry brush with a tiny bit of boiled water to dab.
  6. Use the excess brown icing to make little wings for each cookie, as shown, make a small teardrop, flatten and add some markings with a cocktail stick.
  7. For the beak, mould tiny pieces of the yellow icing into triangles, place them just above the red breast and push a small sharp knife to create an open chirpy expression in the beak.
  8. Add a small ball of white icing to each circle to create an eye, adding a really tiny ball of black to finish. Leave to dry completely, and then tie with baker's twine or ribbon and hang on the tree.