Country preference?
Choose the preferred country to view local content and get a better experience.
Cake decorating tips for beginners
Want to make an impression with a showstopping cake but not sure where to start when it comes to decorating? Follow our simple guide to icing and decorating layered sponge cakes.
It only takes a quick scroll through Pinterest to see that everyone seems to be making stunning cakes these days. From rainbow layers and mirror glazes to chocolate ganache drips, cake decorating has never been more popular, and the creations are getting bigger and brighter than ever.
If all those baking TV shows have left you feeling inspired to create your own spectacular showstopper but you’re not sure where to start, here’s our back-to-basics guide to cake decorating. From how to get a flawless finish on your icing and piping tips and tricks, to the tools every home baker should have, we’ll show you how to ice and decorate a layered sponge cake that is guaranteed to wow.
Preparing your cake
Whether your layered sponge cake is going to have two layers or seven, be plain, chocolate, coffee-flavoured or rainbow coloured, you will need to allow your cakes to cool completely before you start filling and decorating them. If the sponge is still warm the top layers will crumble as you try to smooth anything over it and icing will melt, causing the layers to slip. Chill your cakes in the fridge first, or bake a couple of days in advance of when you want to ice and freeze.
To get a stable structure each layer needs to be level, with a nice flat surface. Sometimes during baking a domed surface can form. Use a cake leveller, or even just a large serrated bread knife, to slowly trim your cake layers so they are all level, ensuring you cut at an even height across the whole sponge. Gently brush away any crumbs using a pastry brush.
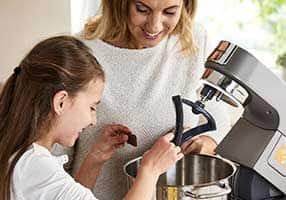
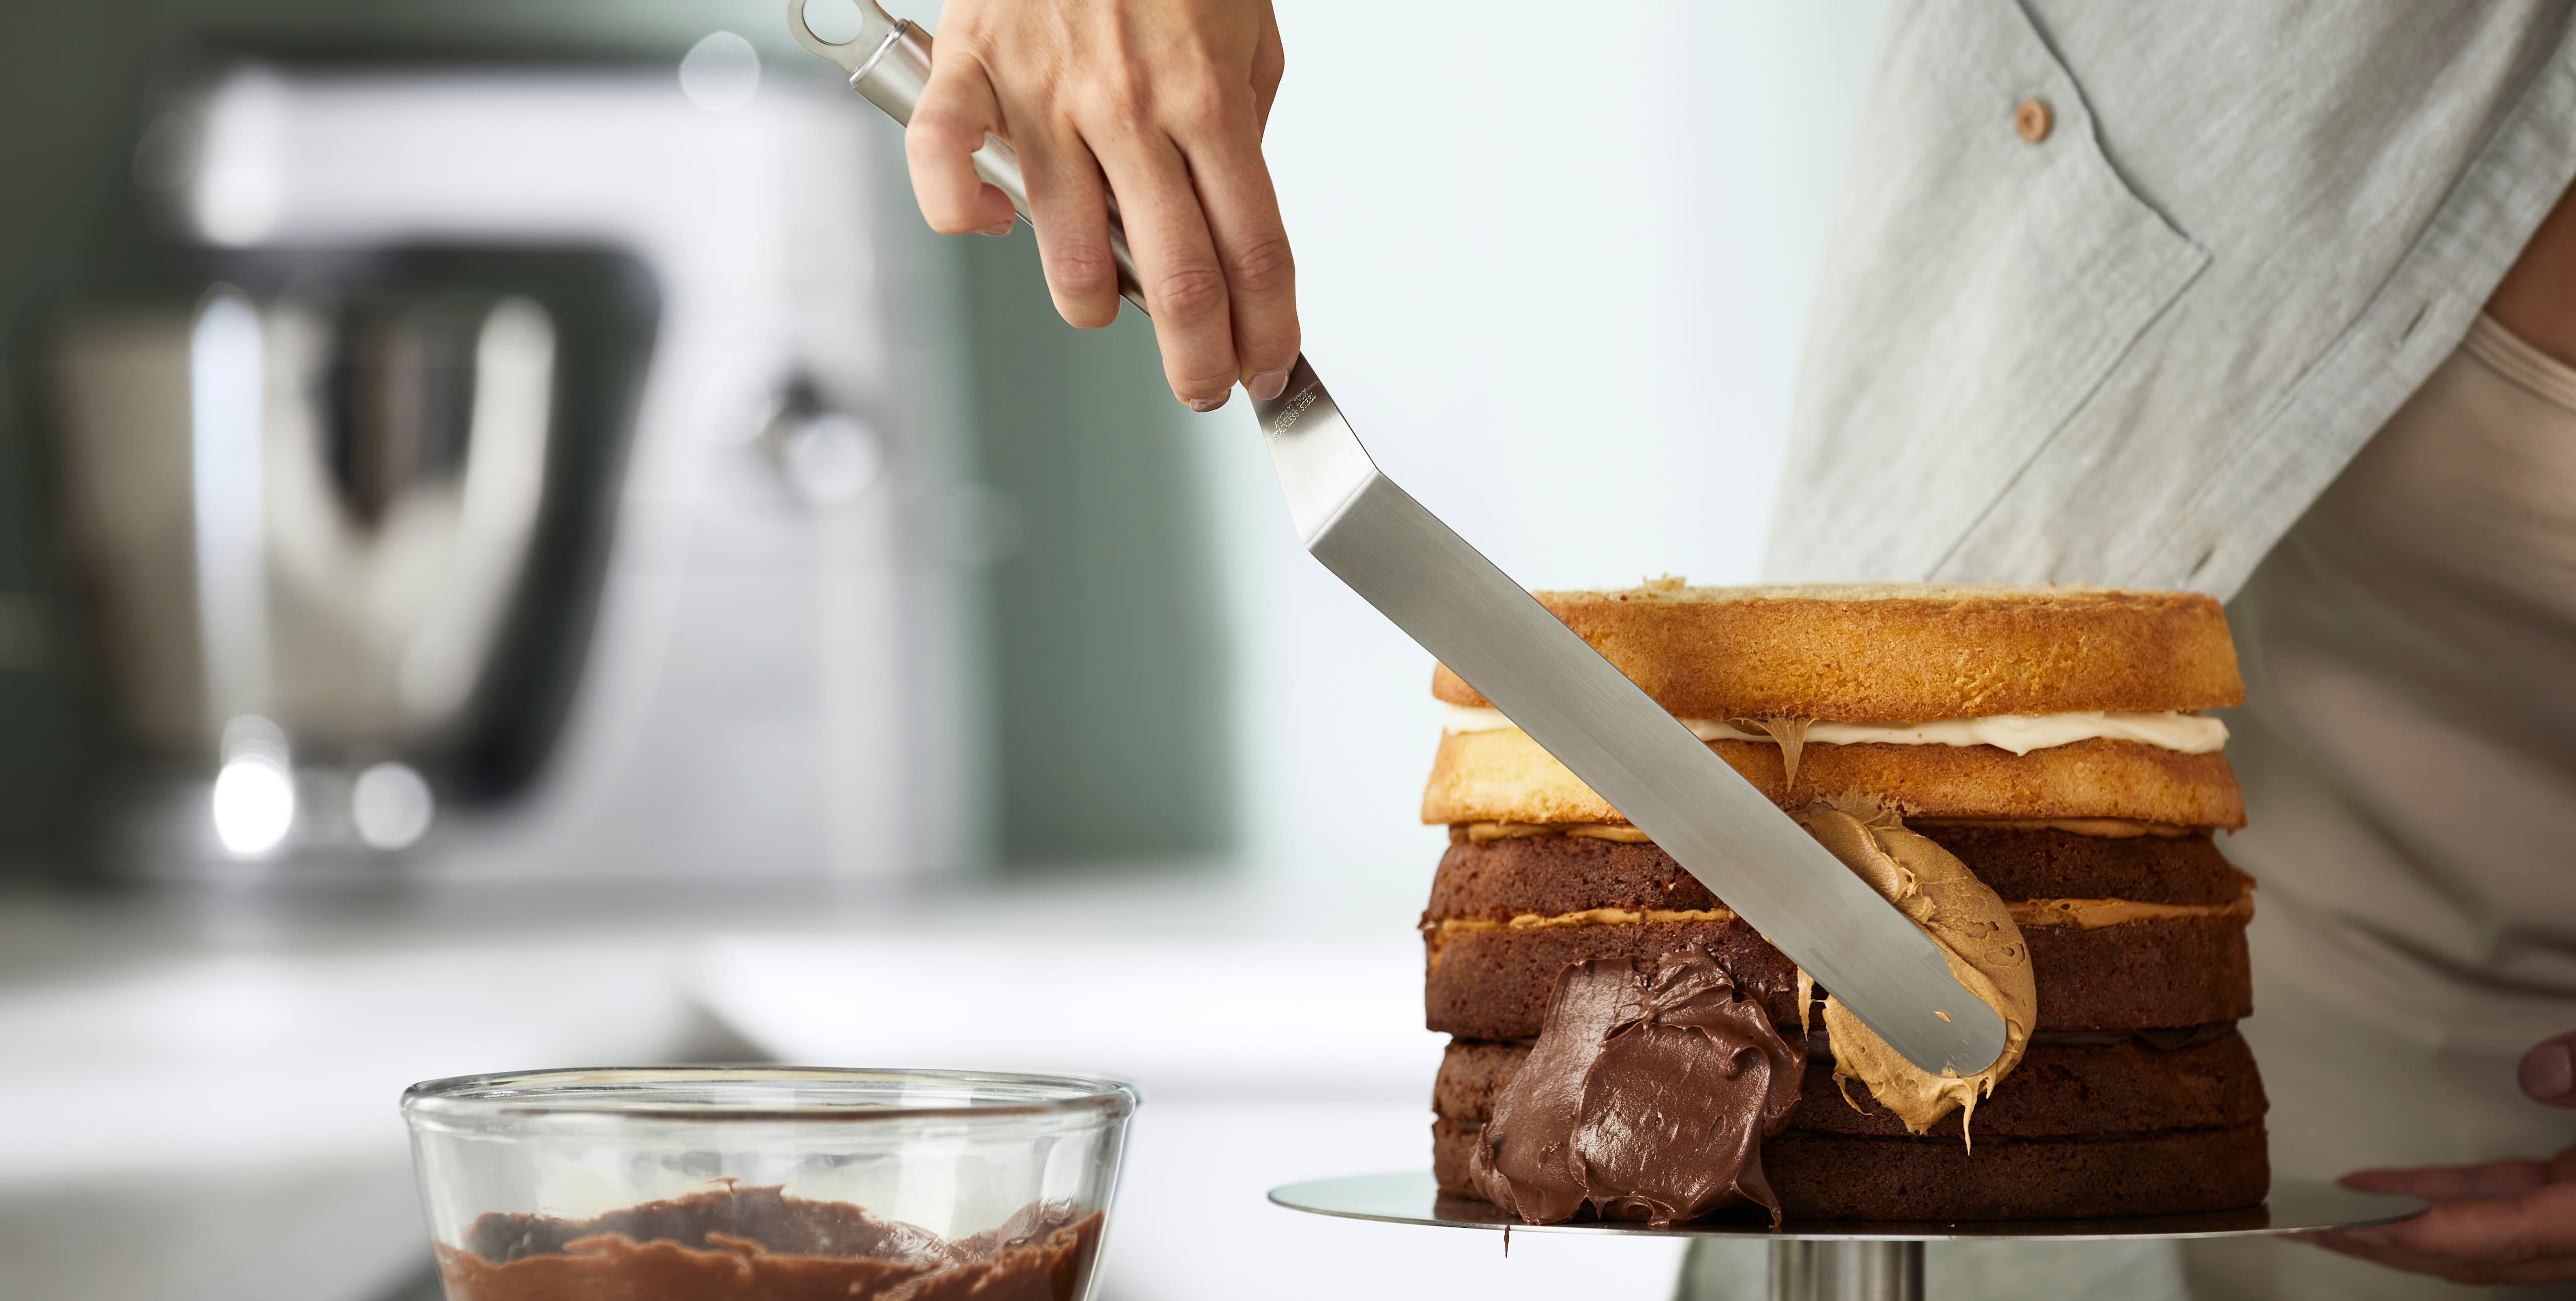
Now your sponge is prepped you can apply your filling to the first layer. Using filling will help to hold the layers together, as well as give your cake flavour and height. Buttercream is a classic filling, but other favourites include jam, chocolate ganache, lemon curd, whipped cream or cream cheese.
If you are using a cake turntable to ice your cake, place your base sponge layer on it. Using a non-slip pad will help prevent it from sliding around as you work. Place your chosen filling in the middle of the sponge and spread out evenly towards the edges using a spatula. Place the next layer on top, making sure the sponges are aligned before pressing down gently. Continue to fill and stack your cakes in this way and then invert the last layer so you place it upside down, bottom side facing up. This will help prevent too many crumbs getting in your icing when you start to decorate- more tips on that to come.
Types of cake icing
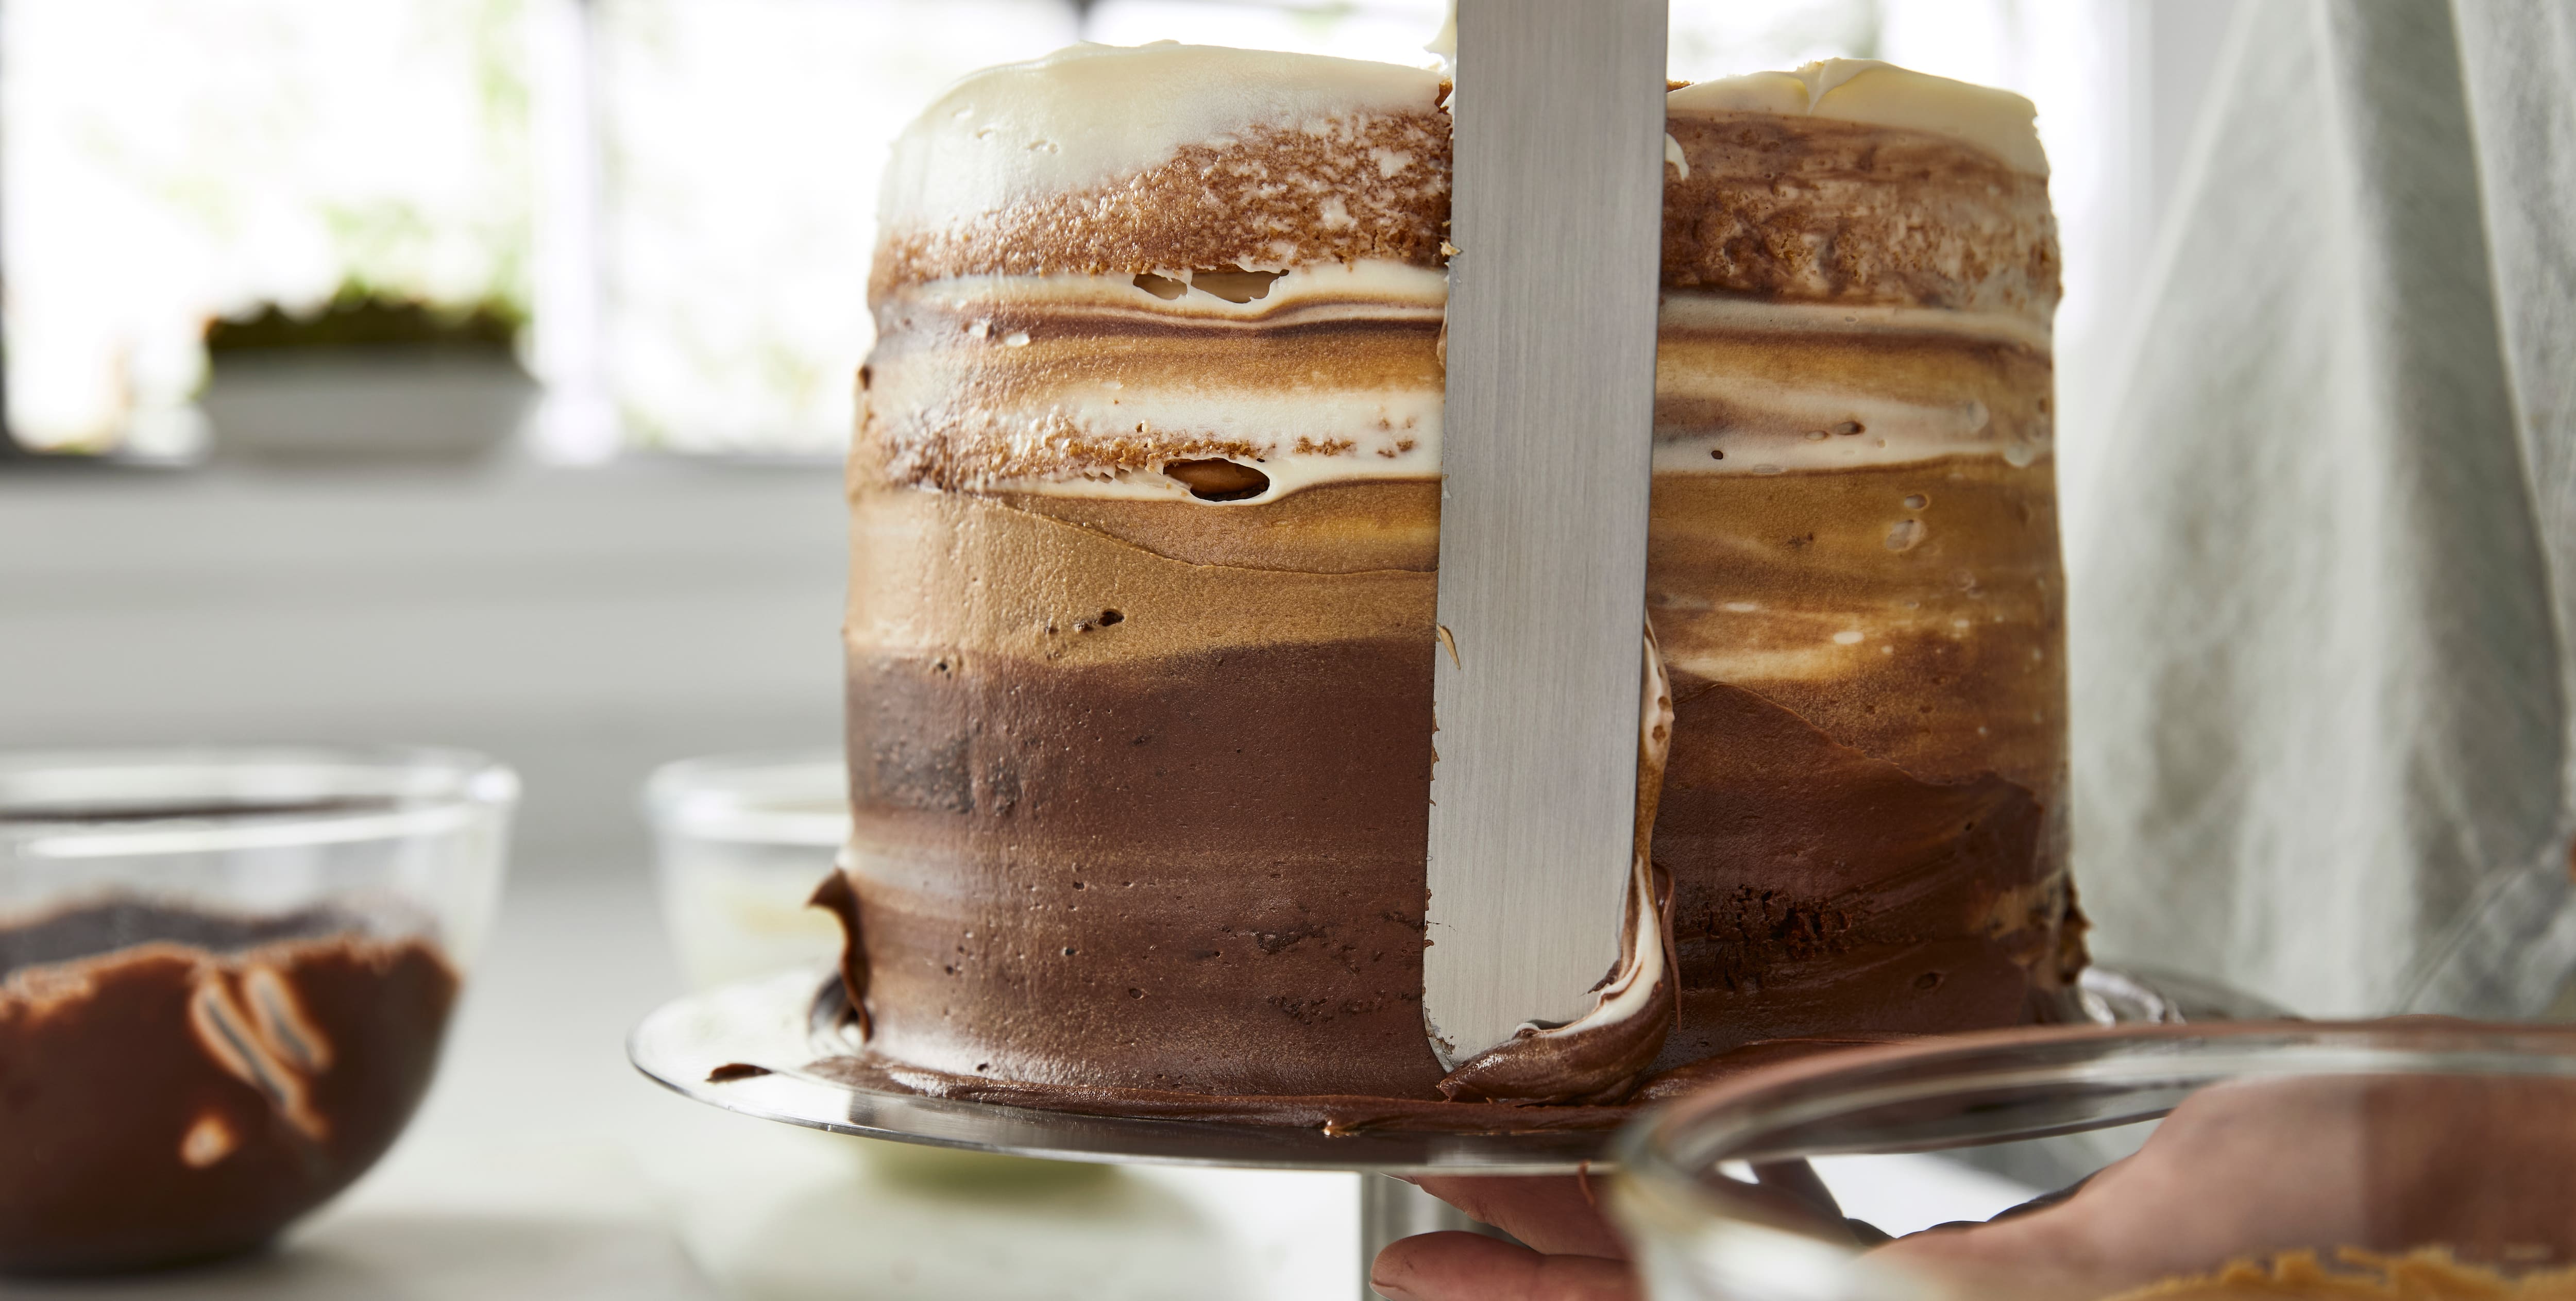
Once you’ve filled and layered your cakes it’s time to ice them. Buttercream is the most commonly used type of icing. Usually made by simply combining butter with icing sugar, it’s incredibly versatile. You can add endless ingredients to flavour it- vanilla, chocolate, strawberry, caramel- and turn it any colour of the rainbow. There’s also meringue buttercream, which is made using egg whites. Lighter and less sweet than regular buttercream, it holds its shape really well, making it ideal for piping.
When using buttercream, start by applying a crumb coat to your cake. This is a light coating of icing that will seal in any stray crumbs, fill gaps between layers and cover up any imperfections. Spread the icing out evenly across the top of the cake and down the sides. You don’t need to use a lot, this should only be a thin coating. Then, take a tip from the professionals and sweep an icing scraper around the sides of your cake as you slowly spin your turntable. This will scrape any excess icing away and create a smooth, even base for your final coat of icing. Chill your cake in the fridge for about half an hour before then applying a top coat.
Fondant icing, or sugar paste, is easy to colour and very pliable, so it’s ideal for cutting and sculpting into decorative shapes for novelty cakes. It can be a bit unforgiving to any lumps and bumps though, so if you’re using it to cover the whole cake surface add a layer of buttercream or jam underneath to create a smoother finish. When rolling out fondant icing, dust it with icing sugar first to stop it sticking to the rolling pin.
Made with egg whites or meringue powder, icing sugar and lemon juice, royal icing sets as a hard, stiff icing. Traditionally used to ice wedding and Christmas cakes, it’s also perfect for piping flowers, writing and intricate patterns. Avoid using it to decorate cakes iced with buttercream though, as the oil in buttercream will cause the royal icing to bleed.
Get creative with decorating
Now your cake is stacked and iced, it’s time to get creative with the decorations! Whether you want to experiment with different textures, go big with striking colour combinations or pile your cake high with edible toppings, there are plenty of ways to turn your bake into a bespoke, one-of-a-kind creation that is guaranteed to impress.
Using buttercream and a piping bag to pipe icing decorations is an easy way to create a showstopper. Choose from different sized nozzles to cover your cake with roses, stars, ruffles or add a border. Or, for the personal touch, use a thin nozzle to write a message. Practice on parchment paper first so you can get used to how the icing flows and what pressure you need to use. Chilling your cake in the freezer for a few minutes first so the icing beneath is firm will make it much easier to correct any mistakes.
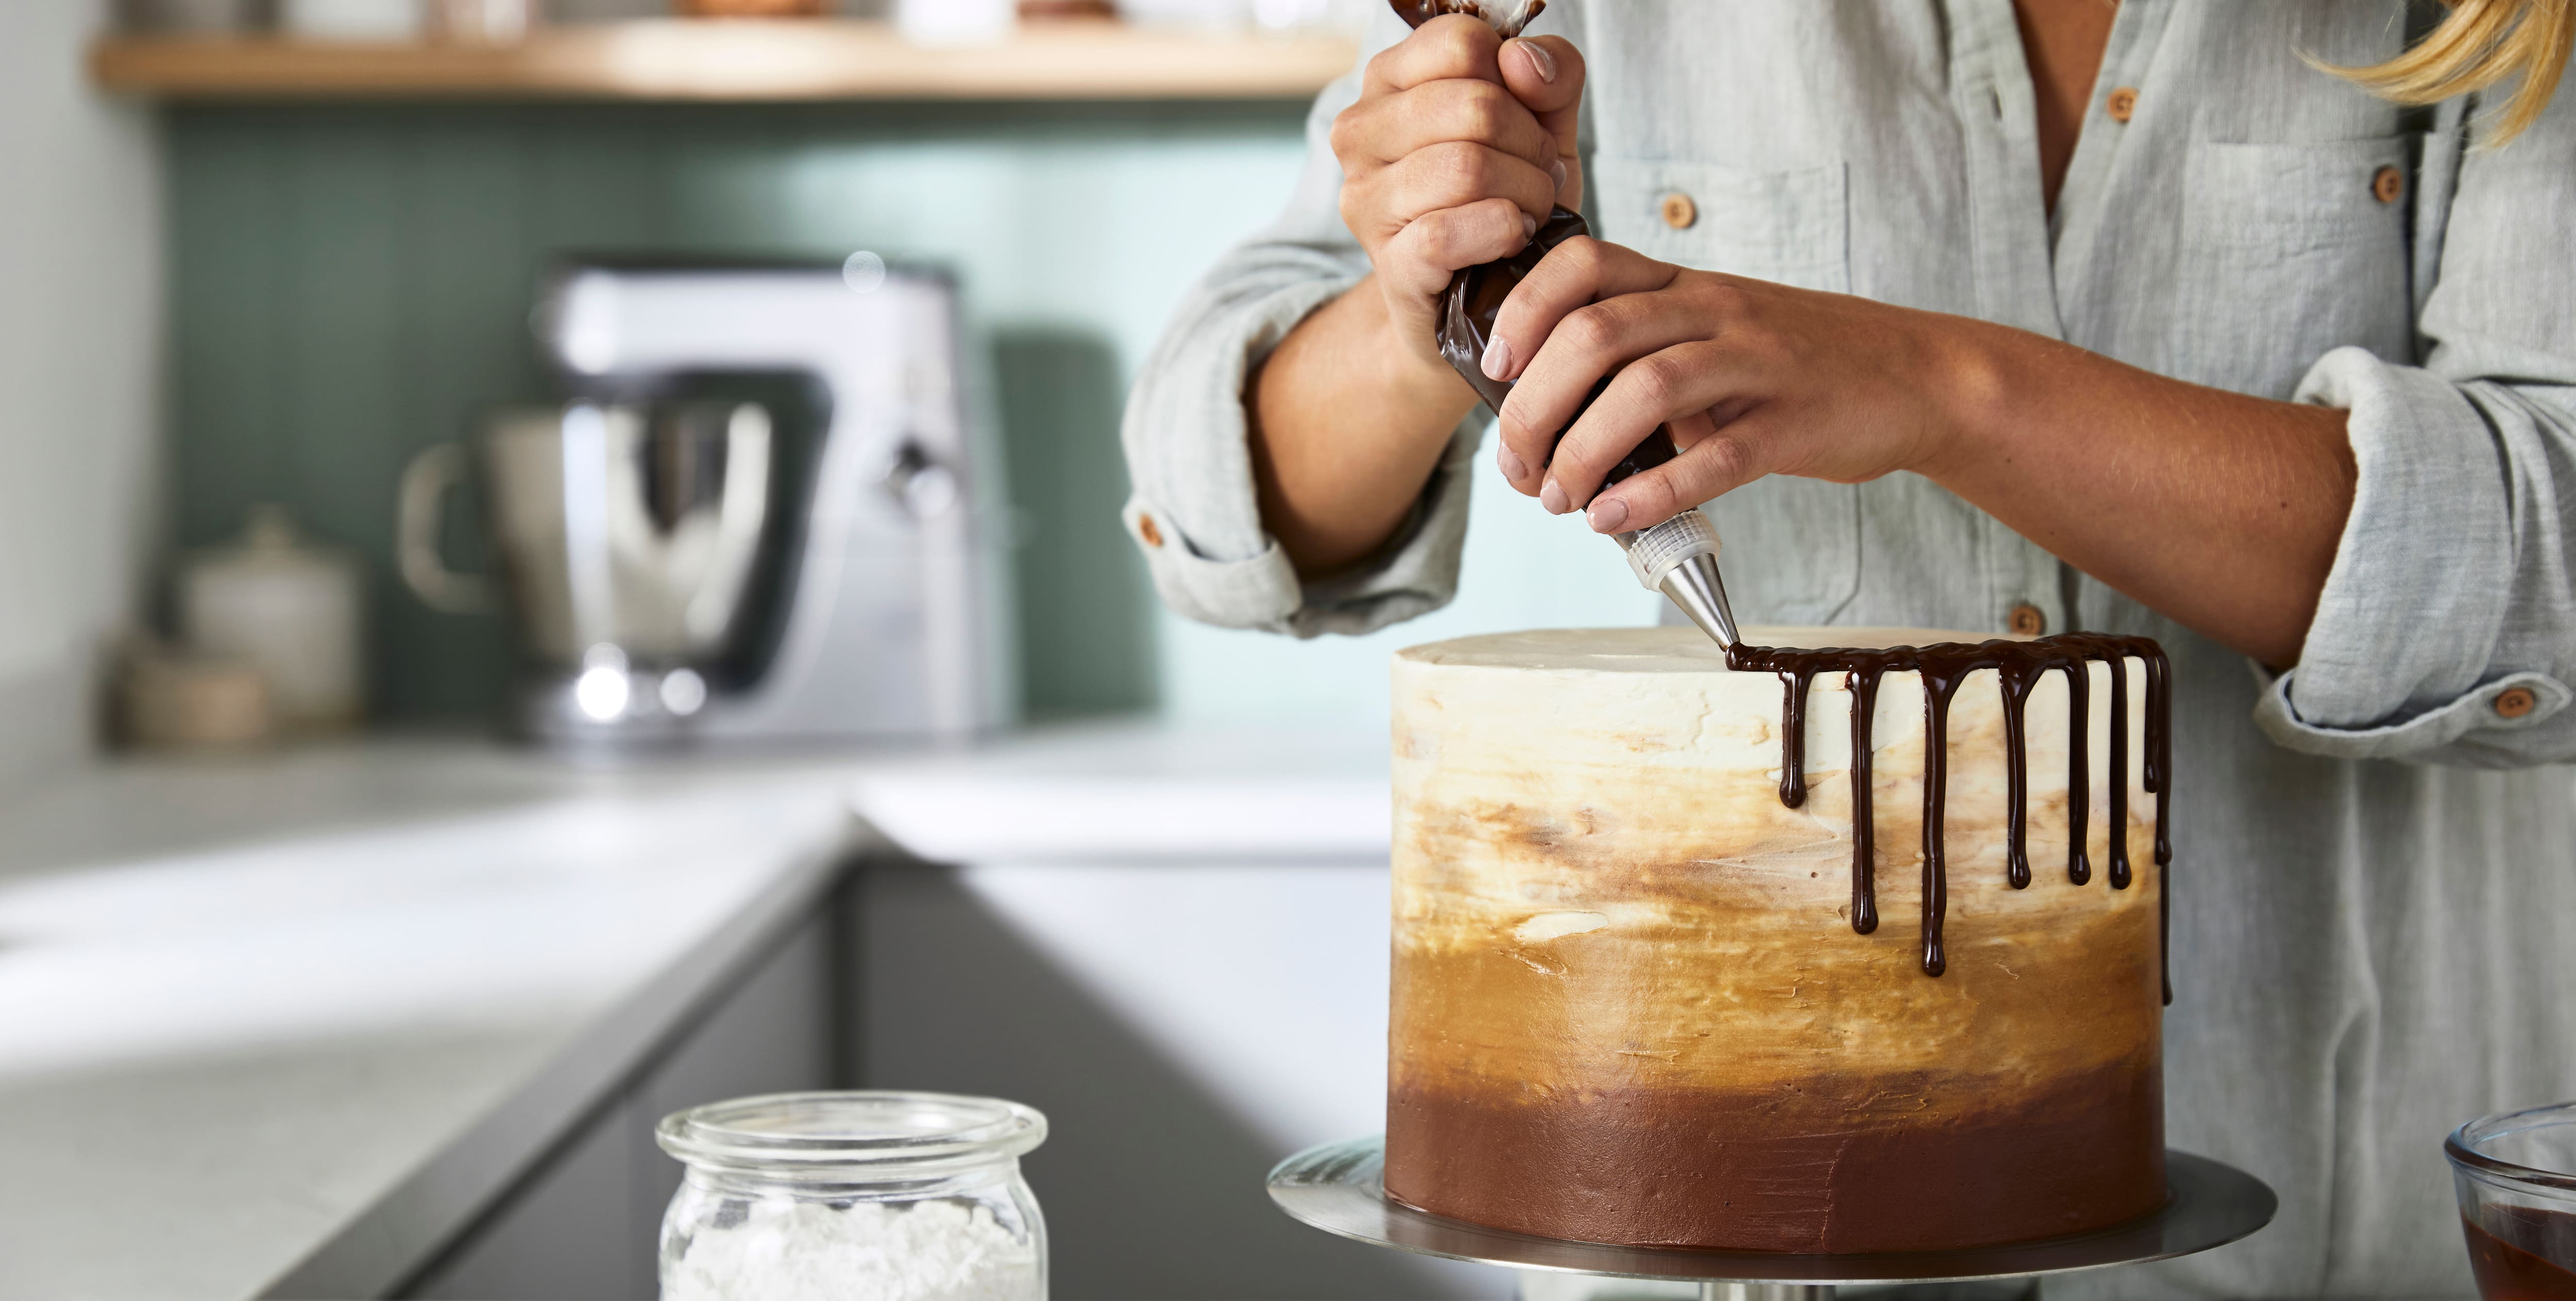
A decorating trend that’s all over social media, drip cakes are perfect for any special celebration. Pour ganache, melted chocolate or caramel over the surface of your cake so that it dribbles over the edges. Cover the whole surface or create a half drip down one side. Finish off by topping with macaroons, chocolates, sweets, fruit or edible flowers.
Ombré icing is another popular trend that delivers stunning results. Using buttercream, blend graduated shades of the same colour up the sides of your cake with a palette knife for a stunning dark to light effect that’s almost too pretty to eat.
All of these techniques are easy to master with a little practice, but if you’re short on time, don’t be afraid to keep things simple. Top your iced cake with some plump berries, chocolate shavings, chopped nuts, edible flowers or shop bought sprinkles, and just tuck in.
Cake decorating tools
To decorate like a pro, you need the right tools. Our decorating set has everything you need to achieve stunning results with ease, including:
- Palette knives- two different sizes for blending and smoothing icing or creating patterns.
- Spatula- for spreading icing.
- Rotating cake stand- allowing you to turn the cake as you ice. Use this once and wonder how you ever got by without it.
- Sponge cake cutter- for levelling off cakes ready for icing or splitting layers so you can apply filling in between.
- Icing scrapers- to give the outside of your cake an even finish and smooth away any imperfections. Use the combed scraper to create different patterns and add texture.
- Piping bag with 14 different sized nozzles- to create icing swirls, dots, flowers, lines or writing.
Ready to create your own spectacular centrepiece with a little help from your Kenwood products? From this decadent layered chocolate cake to this stunning lemon and raspberry celebration cake, you can find lots of delicious cake recipes here.