Massa fermentada (massa mãe): guia para principiantes
O nosso guia simples, passo a passo, para que possa fazer a sua própria massa mãe e utilizá-la no pão favorito de toda a família. Depois de a fazer, poderá utilizá-la sempre que quiser; basta seguir as nossas dicas para a manter e nunca mais olhará para trás.
Como fazer massa fermentada (massa mãe)
A popularidade da massa fermentada tem vindo a aumentar nos últimos anos, à medida que mais pessoas optam por evitar o pão fatiado comercial em favor destes saborosos pães artesanais. Mas a massa fermentada não tem nada de novo; de facto, é uma das formas mais antigas de pão fermentado. O que torna a massa fermentada diferente de muitos outros pães é o facto de não ser feita com fermento convencional, mas com um fermento feito de farinha e água ao longo de vários dias. É isto que dá à massa fermentada o seu miolo macio e o seu sabor azedo caraterístico.
A longa fermentação significa que a massa fermentada é mais fácil de digerir do que o pão feito com levedura de padeiro e tem muito menos glúten. Pensa-se também que o processo de fermentação torna a massa fermentada uma escolha mais nutritiva do que outros pães convencionais, porque decompõe o ácido fítico naturalmente presente nos grãos e facilita a absorção das fibras e dos minerais do pão.
Mas sejamos realistas, a verdadeira razão pela qual todos gostamos tanto de massa fermentada é simplesmente o facto de saber tão bem. Este guia passo a passo irá mostrar-lhe como fazer a sua própria massa fermentada e como confecionar o seu próprio pão. Também partilharemos dicas e truques para alimentar e manter o seu fermento e para marcar o seu pão com um acabamento verdadeiramente profissional.
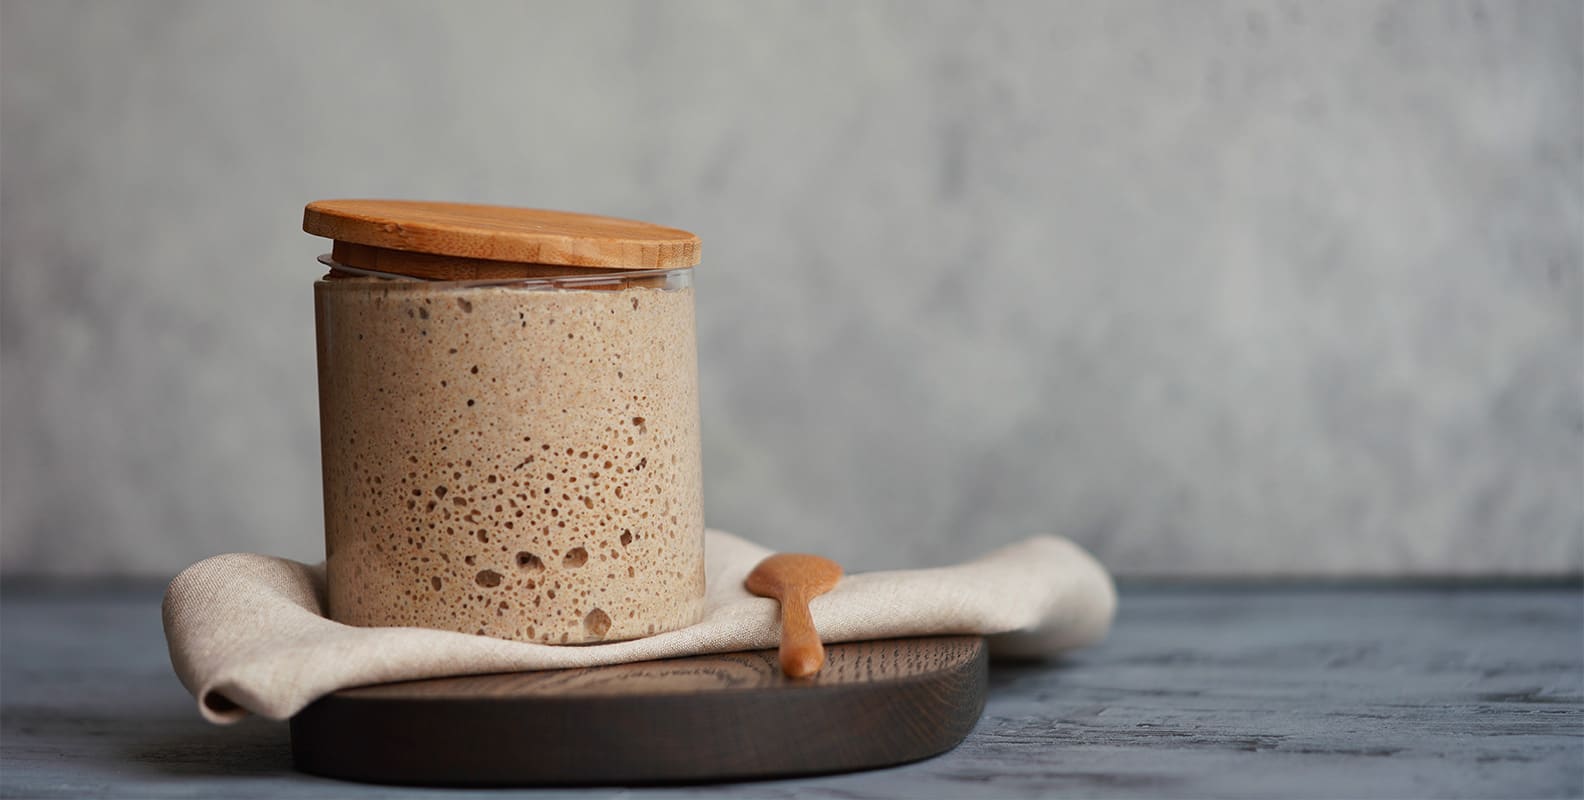
What is a sourdough starter?
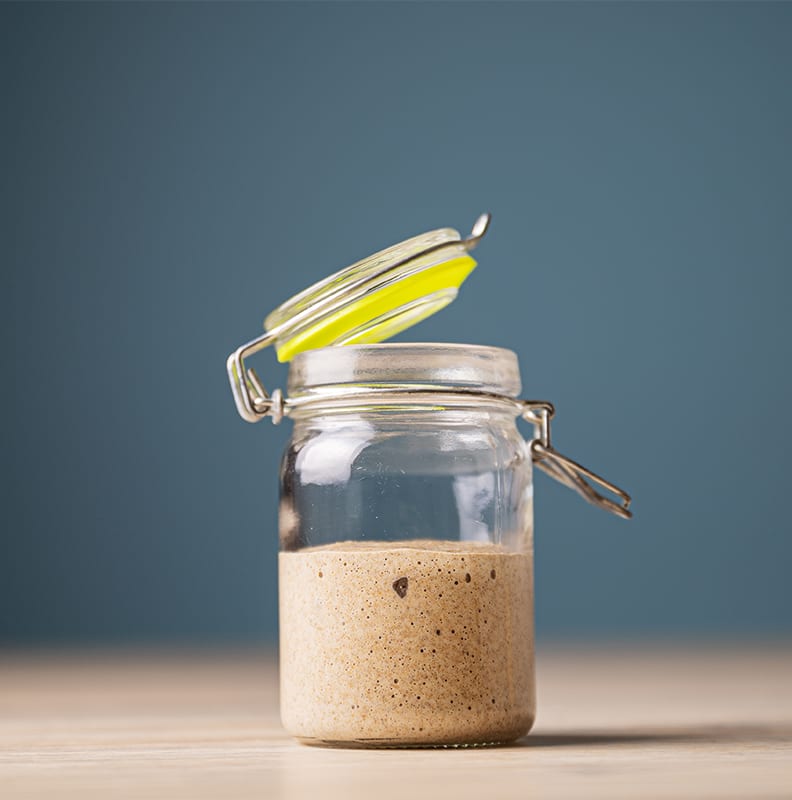
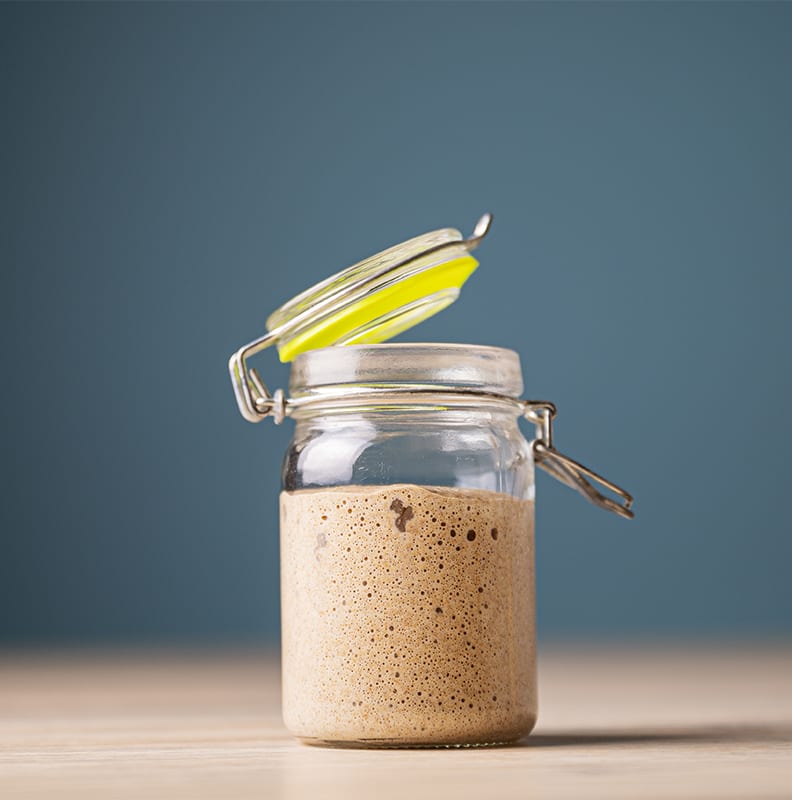
A sourdough starter is simply a mix of flour and water, which, with a bit of time and patience, will begin to naturally ferment as the wild yeast found in the flour starts to activate and multiply. Over the course of about five days and with regular ‘feeds’ of fresh flour and water, the starter becomes a homemade raising agent. As it begins to ferment it will form bubbles at the surface, increase in size and give off a slightly tangy, almost acidic smell. Once it’s ready it can then be used to make a sourdough loaf, rolls or pizza dough.
Essentially your starter does the job of conventional packet yeast. Yes, it takes time to make and needs a bit of attention, but once it’s done you can use it again and again, as long as you keep feeding it. And we promise the delicious results make all the effort worth it- good things really do come to those that wait.
Making your starter
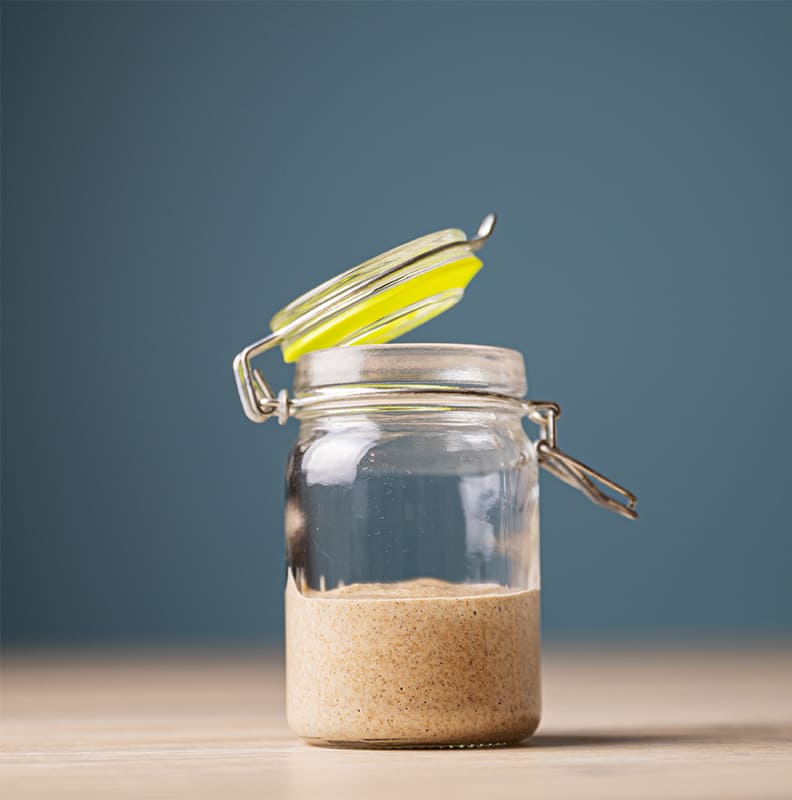
Here’s an easy to follow guide for making, and maintaining, your sourdough starter. If you’re new to making sourdough we recommend using organic strong white bread flour, which due to its fine texture and high protein levels will help encourage a strong gluten development and give your bake a good rise. But you can experiment using rye, wholemeal, spelt or a 50/50 blend of two different flours; just remember that different flours will work differently and yield different results, and your starter may develop at a different rate depending on which you use. You will also need a clear jar or plastic container that is large enough to allow your mixture to double in size.
Day 1: Mix 50g flour and 50g tepid water in your transparent container, ensuring there are no dry lumps of flour left. Mark the level of the mixture on the outside of the container so you can keep an eye on whether it is rising. Leave semi-covered (using a lid or clean cloth) at room temperature for 24 hours.
Day 2: Mix 50g flour with 50g tepid water and add to the mixture, stirring well to ensure it is all combined. As before, cover loosely and leave for 24 hours at room temperature.
Day 3: You should now start to see signs of fermentation. Look for small bubbles forming on the surface of the mixture, or down the sides of the container. Your mixture may have risen and should now be giving off a stronger smell. Stir a mixture of 50g flour and 50g tepid water into the original starter mix, ensuring all the flour is incorporated. Leave semi-covered at room temperature for another 24 hrs
Day 4: Your starter should continue to show signs of activity. As before, feed your starter with a mix of 50g flour and 50g tepid water, making sure it is all combined. Leave semi-uncovered in a warm, sheltered spot for another 24 hrs.
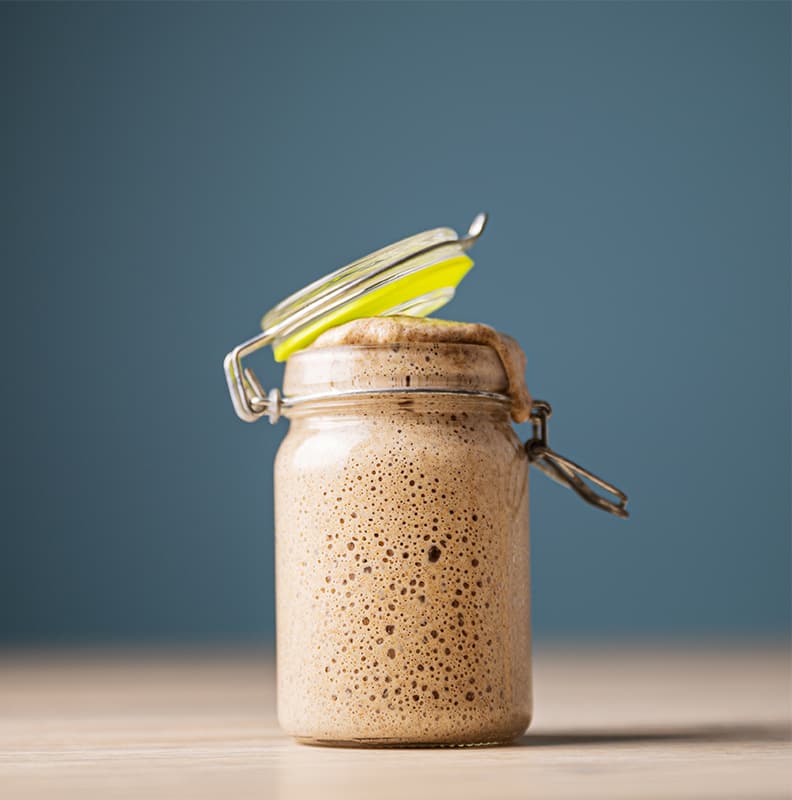
Day 5: By now your starter should be producing an acidic tangy smell, almost like natural yoghurt, and have plenty of bubbles on the surface. It should also have doubled in size. If it has consistently been showing signs of fermentation 24 hours after being fed, it is now ready to use.
If your starter is not yet showing signs of activity, continue to feed it every day, as described in the previous steps.
Day 6: Keep your starter in the fridge until you want to use it. Take it out of the fridge 24 hours before you plan to bake with it. Discard half of it and feed it with a mix of 100g flour and 100g tepid water. Leave it out for 24 hours so it can reactivate. You should see bubbles forming again. To check if your starter is ready to use, drop a teaspoon of the mixture in warm water- it should float.
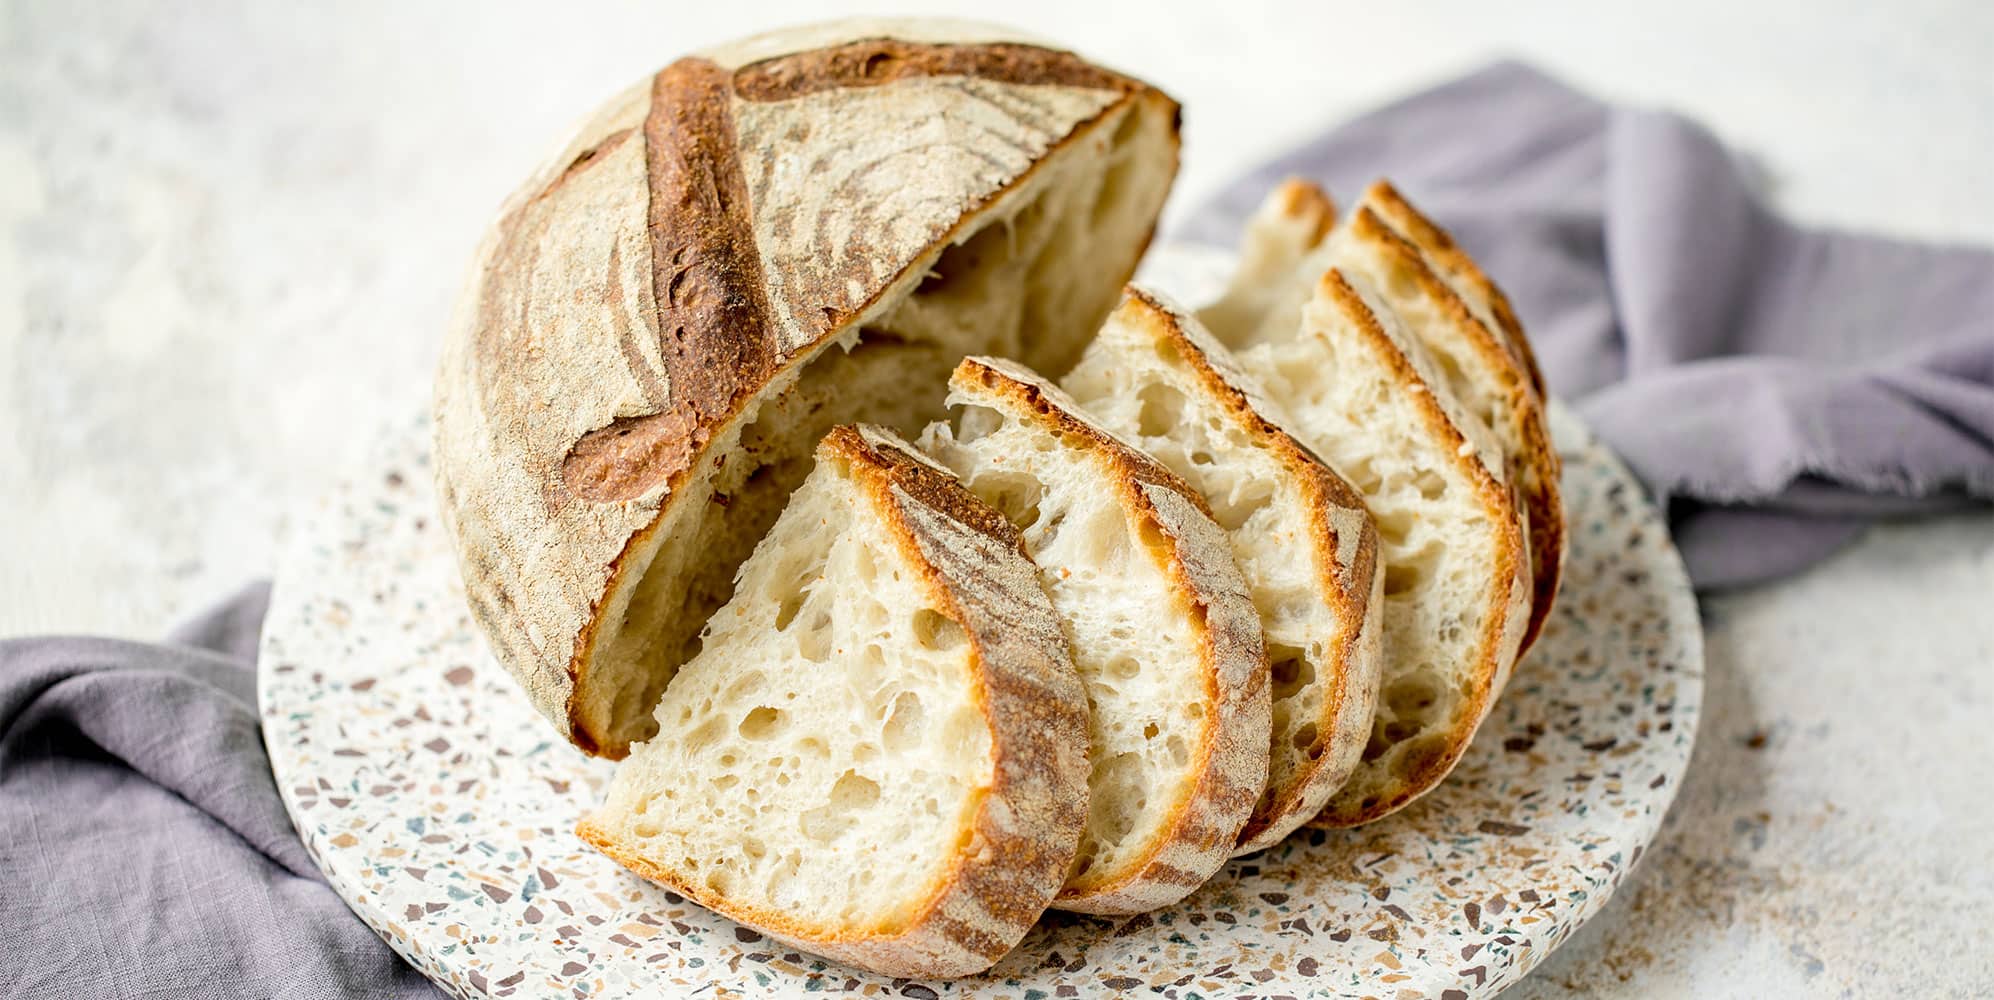
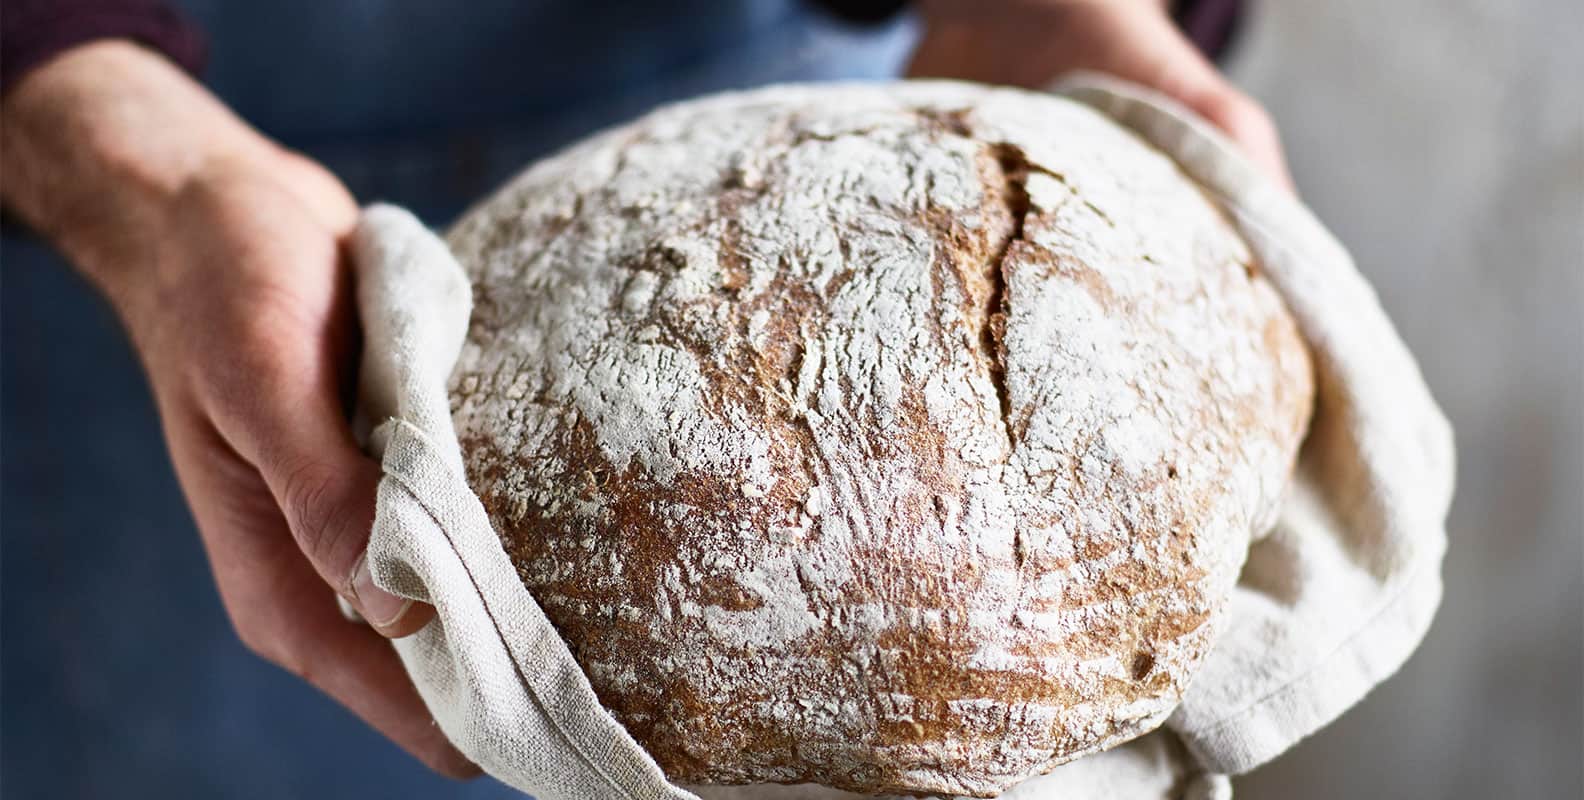
Sourdough bread
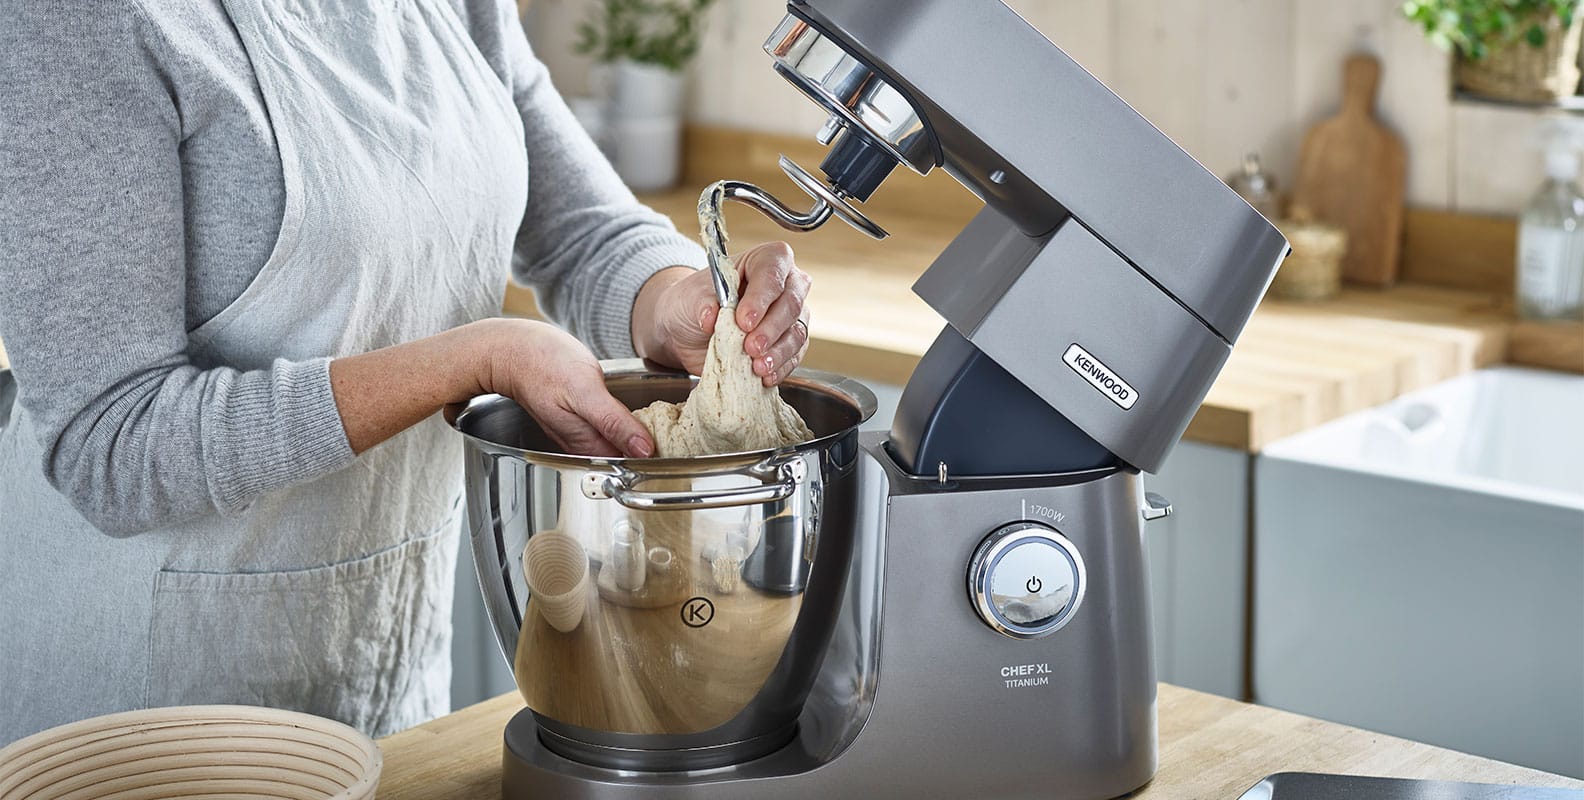
Once your starter is made, it’s ready to use in sourdough recipes. To make a delicious sourdough loaf all you need to do is mix some of it with water, flour and salt. This recipe shows you how, with the help of your stand mixer.
When making sourdough the kneading stage is really important, as it's this process which encourages the gluten to develop and hold the dough together. As the mixture is being kneaded the dough’s consistency will begin to change, becoming smoother and more elastic. Using your stand mixer’s dough tool will take all the elbow grease out of this process, making it pretty much effortless- not to mention a lot quicker than if you were to do it by hand.
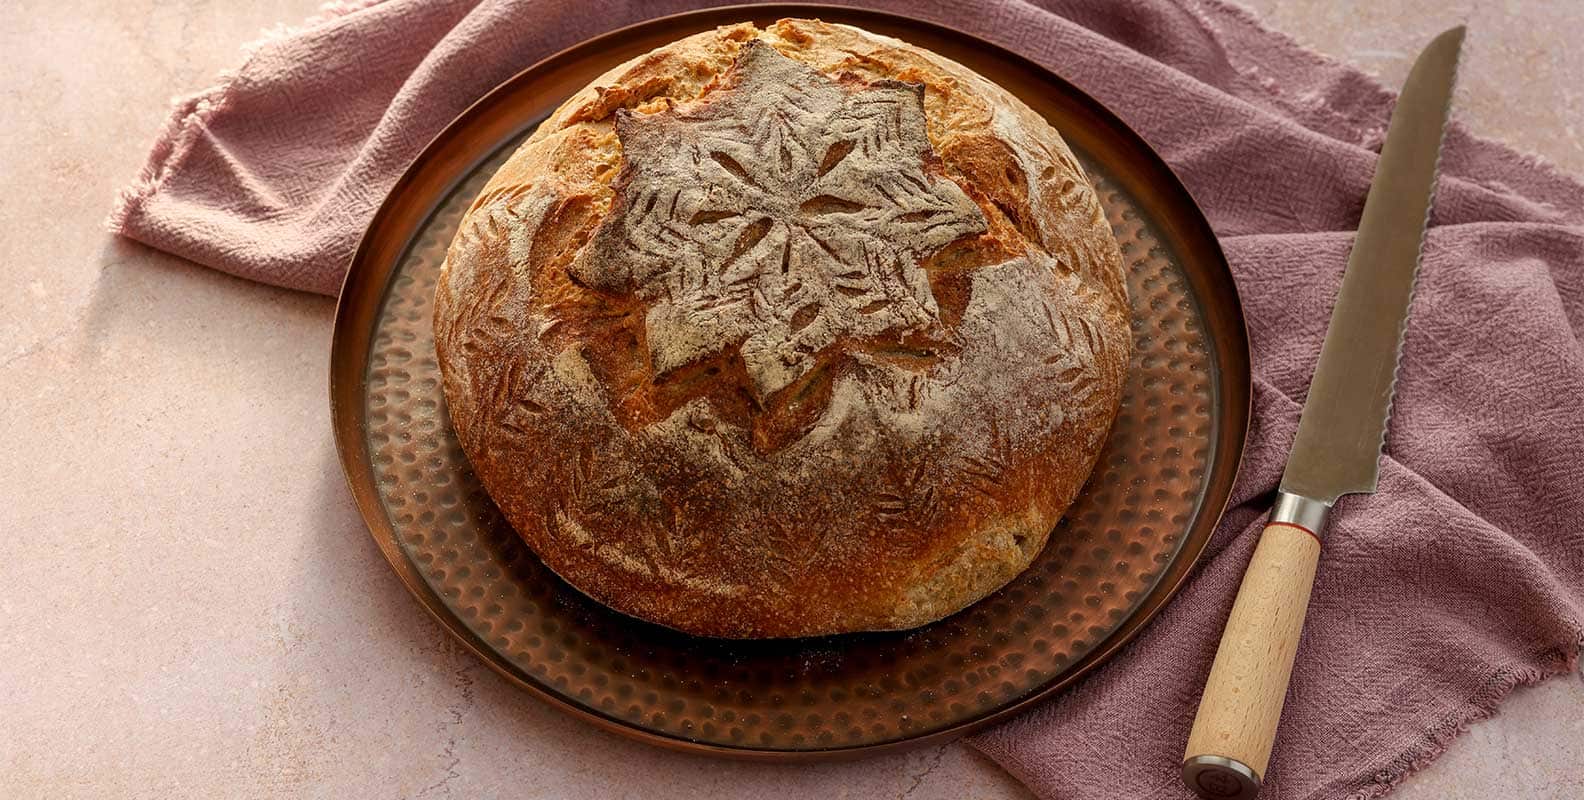
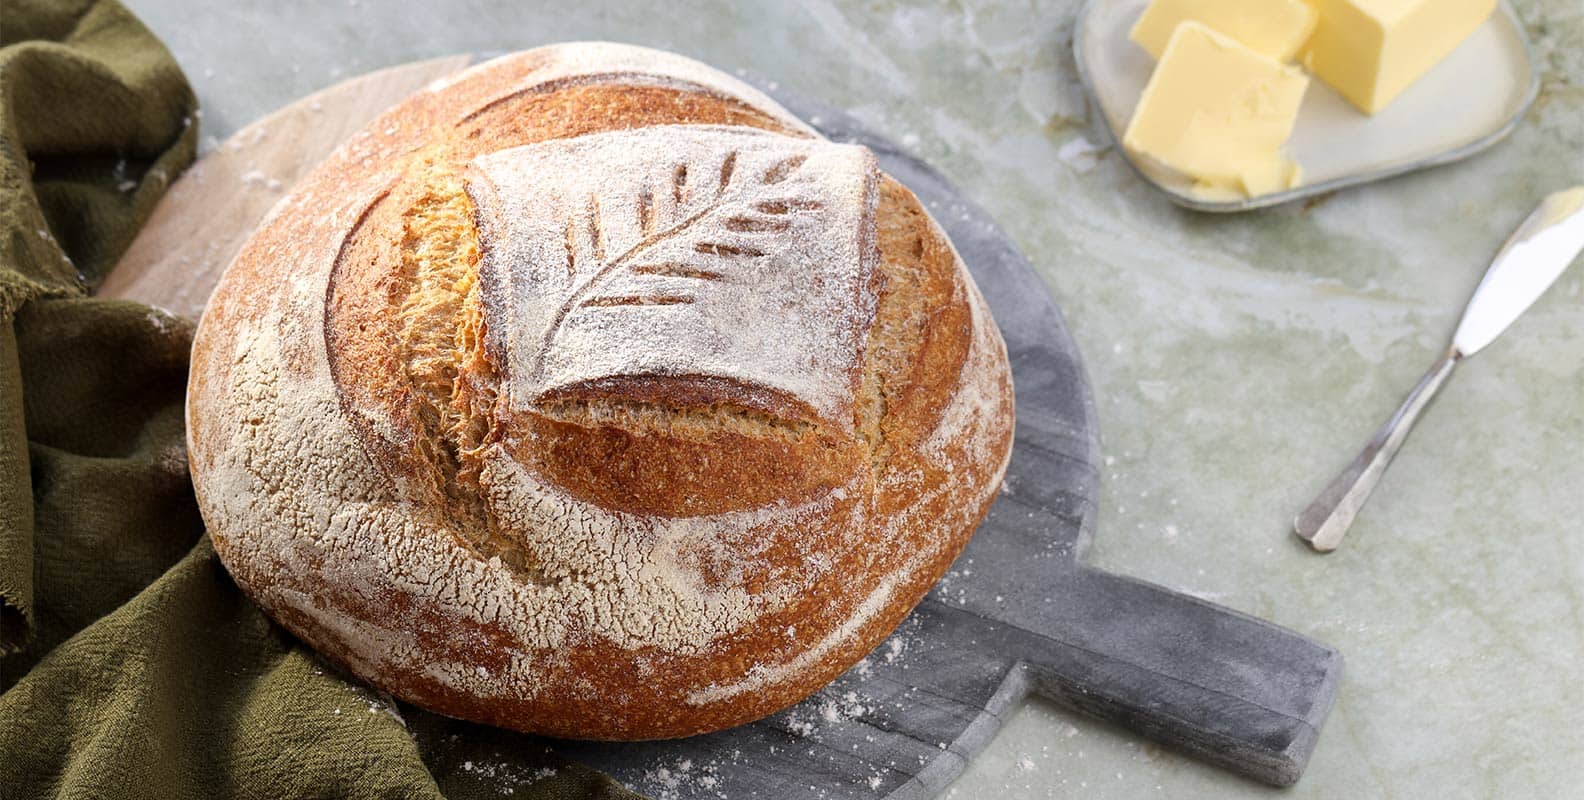
Scoring your loaf
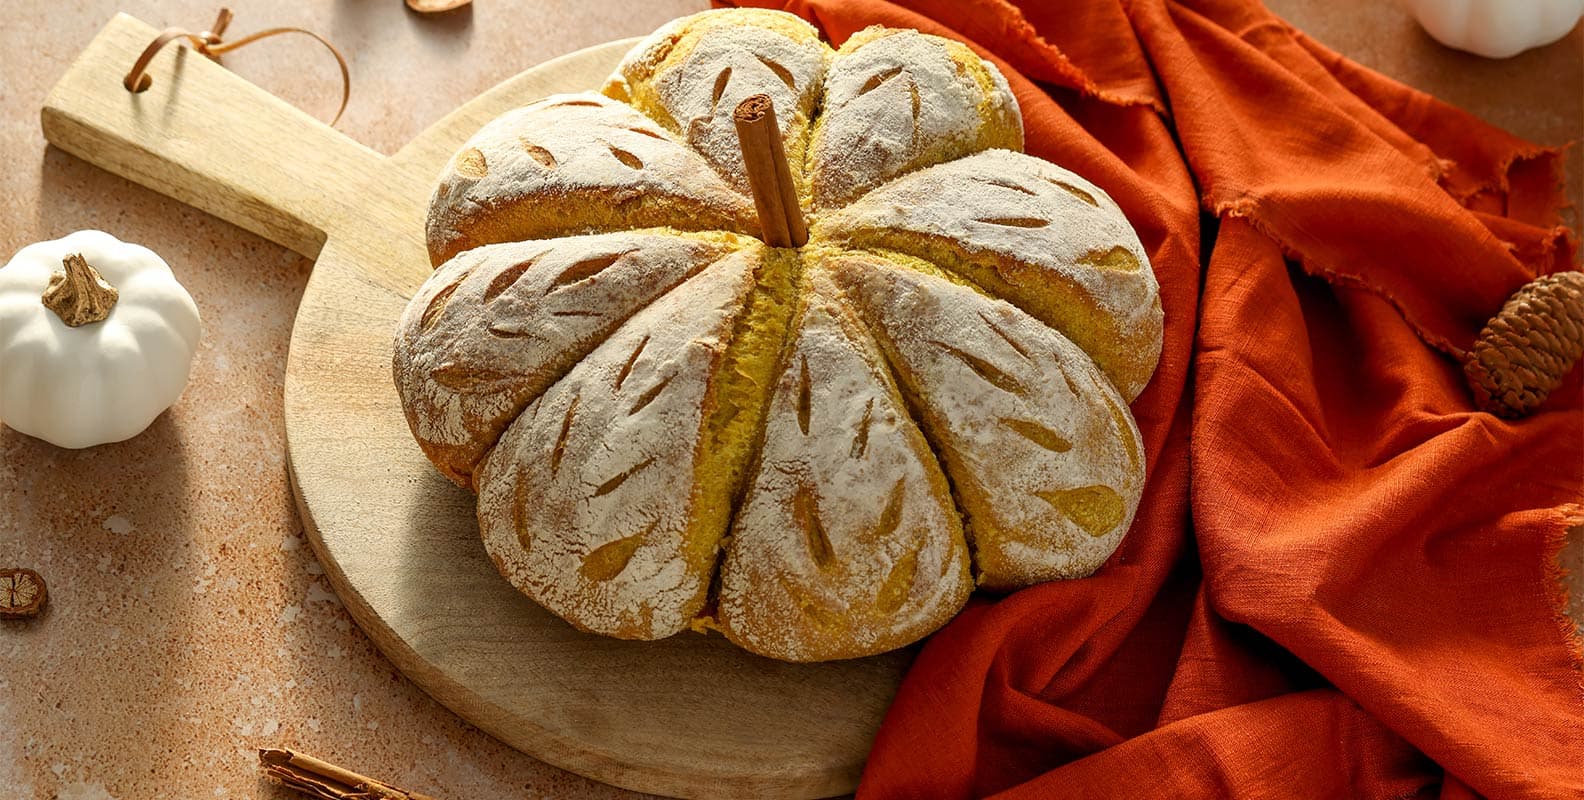
Scoring your bread is the process of making a shallow cut, or cuts, on the top of the unbaked loaf before you put it in the oven. It helps gas produced by the yeast during baking to escape from the dough in a controlled way without rupturing the loaf, allowing the bread to rise evenly. It also gives your loaf that professional finish, and you the chance to add your own personal artistic flourish.
When scoring your loaf you can opt for a single straight slash across the top, or experiment with some more intricate patterns and scoring techniques- such as a cross, double slash, criss cross, leaf or wheat design. You can find lots of inspiration online. Whatever design you choose you will need to include a big slash to help the gas escape without creating an unplanned rupture in the loaf. So if your design involves lots of smaller cuts, you will need to make a big score somewhere- maybe along one side.
Use a sharp knife to score, or a lame (a special baker’s knife) if you’re creating more complex designs. Dust your loaf with flour first using a small sieve to highlight your designs. And then get creative!
Top tips
Be patient Making your sourdough starter is a waiting game, and the temperature of your room can massively affect the rate at which it grows. Choose a spot that is warm (around 20℃) and draught-free. Don’t worry if the temperature is much cooler, your starter will still grow but it will just take longer.
Water wisely Many bakers choose to use bottled or filtered water to grow their starter, believing the chlorine and other chemicals found in tap water don’t create the optimum breeding environment. However, many a successful loaf has been produced using tap water; the key thing is that the water should be lukewarm rather than cold, as it’s this warmth that will help kick start the fermentation process. If you live in an area where the tap water is heavily treated but would rather not buy bottled water, try leaving a jug of tap water out overnight before you use it.
Maintaining your starter Continue to refresh your starter once or twice a week in between bakes- the bacteria within are live and need feeding. If you are baking with it regularly (a couple of times a week) you can keep it out at room temperature, which will mean it's ready to use faster. Otherwise keep it covered in the fridge and take it out 24 hours before you next want to use it. You will need to activate it each time you want to use it, bringing it back to room temperature and feeding it. Wait for it to bubble and double in size.
Don’t give up If your starter doesn’t double in size or pass the float test, don’t be too discouraged. The wild yeast and bacteria that bring your starter to life are natural organisms and therefore a bit fickle and hard to predict. Sometimes all you need is a bit more time. Continue to feed for a few more days until you see consistent signs of fermentation and the mixture rising.