Jubilee Piñata Cake by Juliet Sear

This jolly cake has a hidden cavity that you can fill with any sweets or treats. I’ve gone with red, white and blue choco balls and sprinkles for the Platinum Jubilee. This looks really impressive but is fairly simple to ice as long as you have the Petal nozzles, which create the ruffle effect.
Ingredients
For the sponge:
- 250g softened butter, at room temperature
- 250g caster sugar
- 250g self-raising flour
- 5 x medium free-range eggs
- 2 tsp vanilla bean paste or extract
- 600g unsalted butter, softened at room temperature
- 1.2kg sifted icing sugar
- 1 tbsp. vanilla bean paste or extract
- 100g Jam (optional)
- Red and blue paste colours (I use strong gel colours these are better for getting a good colour without making the icing runny)
- Sprinkles or sweets to fill
Tools
- Stand mixer with paddle attachment (or do by hand)<
- 3 x 8” round cake tins (or do in batches)
- Baking parchment
- Round cutter approx. 7cm (or cut around a cup or glass)
- Palette knife/s
- Cake side scraper (optional)
- Large plastic piping bags
- 3 x Large Petal nozzles to create the ruffles
- Cake stand or plateserve.
Method
To make the sponge:
- Preheat the oven to 180 degrees and grease and line 3 x 8 inch tins.
- Place the butter, sugar and vanilla into your mixing bowl and combine. Turn the speed to high (or if you’re using a wooden spoon, use plenty of elbow grease!) and beat until the mixture is very pale, soft and fluffy.
- Add the eggs, one at a time, beating it in slowly each time.
- Add the flour gradually, one-quarter at a time, mixing gently on a slow speed, until it has mostly been incorporated. Fold with a metal spoon if doing this by hand. Take care not to mix or beat vigorously or your sponge can turn out a bit tough.
- Divide equally between the tins and bake for 20-25 mins until a knife (or skewer) comes out clean.
- Leave the cake on a wire rack to cool.
- While it’s baking get your frosting ready.
- Beat the butter, icing sugar and vanilla together until very pale and creamy. Remove 1kg of the buttercream and divide that into 3 bowls.
- Tint one bowl red and one blue, then load each colour and the white into 3 x piping bags fitted with a large petal nozzle (best if they are all the same size so it looks neat!). Keep the rest of the buttercream covered for the filling and first coat.
- Cut a hole out of two layers to create your circular cut out pieces for your sweetie cavity.
- Place one ring on the cake stand and spread and then go around the edge with jam if using and a layer of buttercream.
- Place the second ring on top and repeat with more jam and frosting, then pack the middle full of sweets and/or sprinkles.
- Top with the last full cake layer, invert the sponge so the smooth part that was in the base of the tin is uppermost, press down to create your cakey lid and seal in the sprinkles.
- Using the rest of the buttercream and a palette knife, spread a fine coating of buttercream all over the cake on the top and sides to crumb coat and give you a neat thin base. Pop in the fridge to set for about 30 mins, then decorate with the patriotic ruffle colours.
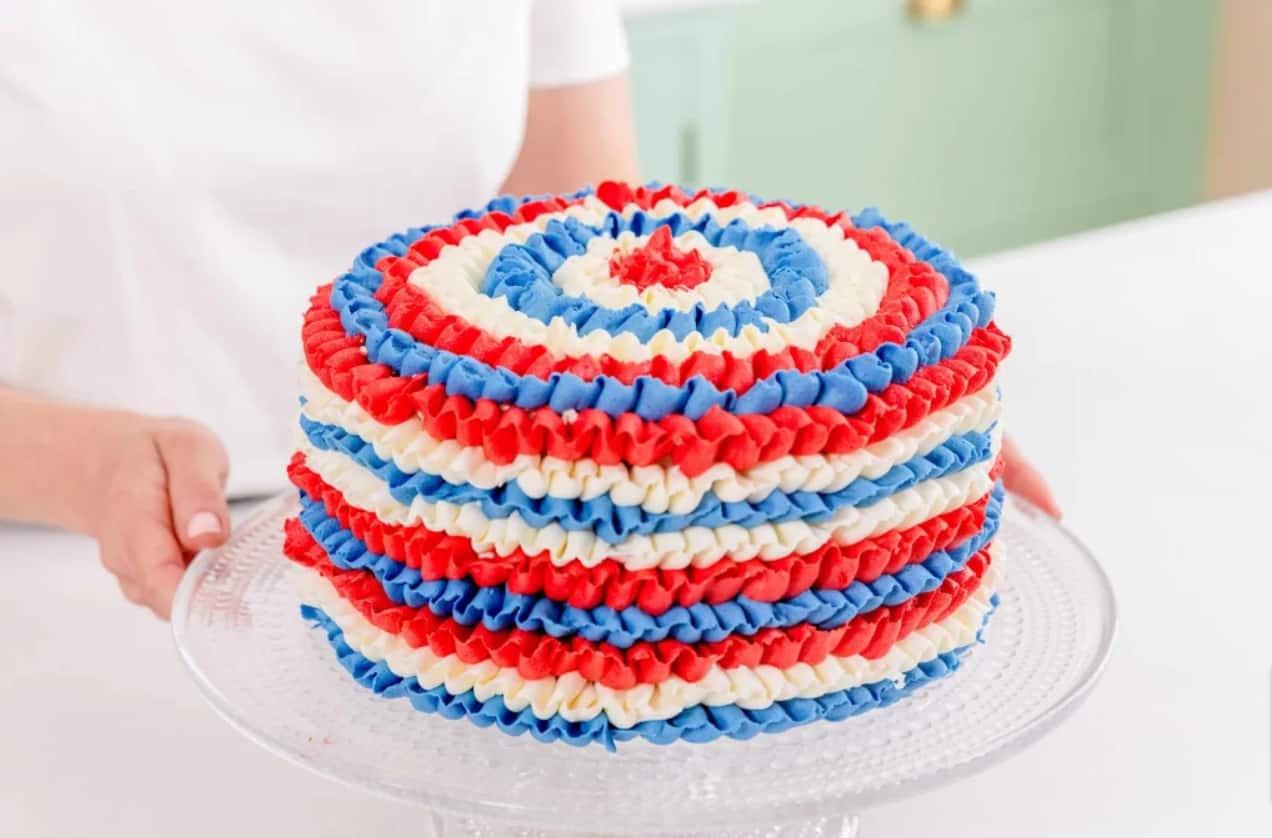
- Begin at the bottom of the cake and hold the piping bag with the petal nozzle against the sponge. Make sure that you have the wider fat point touching the cake and the thin part of the nozzle facing outwards. By using a wiggly, wavy motion as you pipe around the cake edge, this will create a ruffle effect in a ring around the cake.
- Once you’ve finished the first ring of colour and got back round to your starting point, change colour and repeat in the same way piping a wavy line around above the first ring.
- Continue until you’ve covered the whole side of the cake. Once you reach the top, you can continue piping ruffles around the edge, but now come into the centre of the cake by piping smaller and smaller decreasing circles until you get to the middle of your cake. This is a great one to do because it really doesn’t matter if it’s not perfect or super neat, as all the colours and ruffles look great together, so any imperfections or unlevelled lines all merge into the one design.