- Yleiskoneet
- Lisäosat
- Pienlaitteet
- Inspiraatio
- Promo
Country preference? Choose the preferred country to view local content and get a better experience.
| Serves: 20 (normal slices) | Course: Dessert | Total time (min.): 65 |
For the coconut sponge:
680g self-raising flour
16g baking powder
160g desiccated coconut
600g caster sugar
230g unsalted butter, cubed and room temp
220g vegetable oil
12 egg whites (you can use liquid egg whites to reduce prep time and food waste)
680g coconut milk
120g sour cream
zest of 4 lemons
3 tbsp coconut rum, or substitute with 2 tsp of coconut extract
For the lemon Swiss meringue buttercream:
250g egg whites, roughly 6 egg whites
400g caster sugar
350g unsalted butter
Zest of 2 lemons
2 tsp vanilla extracts
1/8 tsp salt
1 jar of lemon curd
Two-tier cake:
1 - To make the cake sponges, start by greasing and lining the baking tins and preheat the oven to 160°C.
2 - Attach the 5L mixer bowl to the machine and fit the K-Beater, then add the flour, baking powder and desiccated coconut.
3 - Start the machine on Min speed and mix for 20 seconds until combined. Remove the bowl and set aside.
4 - Attach the 7L EasyWarm mixer bowl and fit the creaming beater. Weigh in the sugar, butter, and oil, then start the machine on Min and gradually increase to speed 3. Mix for 3 minutes until pale and fluffy.
5 - Replace the creaming beater with the whisk, then add the egg whites to the bowl and mix on Speed 5 for 2 minutes.
6 - Add the coconut milk, sour cream, lemon zest, coconut rum into the bowl and whisk on Speed 5, for 1 minute.
7 - Once combined, replace the whisk with the K-beater. Add half of the dried ingredients from the 5L bowl to the 7L EasyWarm bowl and fit the splash guard.
8 - Start the machine on Speed 5 and mix for 30 seconds. Add the remaining dry ingredients, then with the splash guard fitted, start the machine on Speed 5. Mix for 1 minute until fully combined.
9 - Pour the mixture into the prepared tins.
10 - Bake for 20 minutes or until lightly golden brown (be careful to not overcook, otherwise the cakes will be dry).
11 - Remove from the oven and allow the cakes to cool in the tins for 10 minutes before emptying onto a cooling rack.
12 - Re-use the tins to bake the remaining cake batter.
13 - To freeze, wrap the sponges in cling film and then a layer of tin foil. Place in the freezer and ensure they lay flat until completely frozen, once frozen you can place them on their side or stack them on top of each other in your freezer.
14 - To defrost, remove the sponges from the freezer, then remove the foil layer. Keep the cling film covered and lay each layer flat and allow to thaw at room temperature.
Lemon Swiss meringue buttercream:
1 - To make the buttercream, place the 5L Chef mixer bowl into the fridge before you begin (this will keep the meringue mixture cool to prevent melting the butter later).
2 - Meanwhile, attach the other 7L EasyWarm mixer bowl to the machine and fit the whisk.
3 - Weigh the sugar into the bowl and add the egg whites. Set the temperature to Off, speed to Max, time to 30 seconds, until homogenous.
4 - Fit the splash guard and then set the temperature to 9, speed 4 and the time to 6 minutes.
5 - Once whisked, remove the 7L EasyWarm bowl and pour the meringue mix into the chilled 5L Chef bowl. Attach to the machine and whisk on Max speed for 3 minutes.
6 - Quickly check the temperature of the meringue. If it is warm, then it will melt the butter, prevent this by chilling again in the fridge for 5 minutes, if necessary.
7 - Replace the whisk with the creaming beater. Start the machine on speed 2, and whilst mixing, gradually add the unsalted butter one cube at a time.
8 - Wait for each cube to be incorporated before adding the next to avoid the mixture from curdling. This whole process should take around 6-9 minutes.
9 - If the mixture appears too liquid, place in the fridge for five minutes before continuing. Once all the butter is incorporated, add the lemon zest, vanilla and salt. Start the machine on speed to 2 and mix for 30 seconds to combine. Transfer a third of the mixture into a piping bag.
Layering and assembling the cake:
1 - You will need a cake leveller, cake turntable, right angled spatula, straight edge cake scraper, 7-inch cake board/drum (12mm thick), 6-inch corrugated cardboard cake board, 6-inch cake board (5mm thick), 5-inch corrugated (make sure the cake boards have a circle in the middle for the centre dowel) 8 x 12” White Poly Cake dowels, 1 x 12” Wooden dowel (for the centre dowel), heavy duty scissors and a small spirit level.
2 - To layer the bottom tier (7-inch) cake, use a cake leveller to evenly level each sponge layer. Spread a small amount of buttercream onto the cake board, then place one of the sponge layers onto the board uncut side down. Press down gently to help it sick to the board.
3 - Cut the tip of the piping bag open, pipe a layer of the buttercream onto the first sponge layer.
4 - Pipe a ring of buttercream approximately ¼ inch in from the edge of the sponge Add a small amount of lemon curd into the middle of the ring of buttercream, then spread the curd out to the buttercream ring.
5 - Place the next sponge layer on top, uncut side down. Press down gently with the palms of your hands held flat to ensure the cake remains level.
6 - Insert a poly dowel into the cake, pushing it right through until it touches the cake board beneath. Insert another four more dowels into the cake.
7 - Add a thin layer of buttercream, then place the 6-inch corrugated cake board on top. Press down slightly.
8 - Repeat the buttercream, lemon curd and sponge layering process for the last two 7-inch sponges. Finish by placing the final sponge layer on top, cut side down, so that the flat uncut side faces upwards.
9 - Press down gently to ensure the cake remains level. Insert another four poly dowels into this layer.
10 - Completely cover the sides and top of the cake in a thin ‘crumb coat’ of buttercream, use a right-angled spatula for a smooth finish. Transfer to the fridge.
11 - For the top tier (6-inch) cake, repeat the above layering process with the buttercream, lemon curd and sponges, then finish with a thin ‘crumb coat’ of buttercream as before. You will only need four dowels in the bottom layer as it will not need to support any extra cake weight.
12 - Place both layered cakes to the fridge.
13 - To assemble the cake, carefully remove both layered cake tiers from the fridge and set a base cake board onto a turntable.
14 - Spread a small amount of buttercream onto the base and carefully place the 7-inch cake on top. Ensure the 7-inch layered cake is in the centre of the board.
15 - Spread a small amount of buttercream onto the top of the 7-inch cake, then carefully place the 6-inch layered cake on top.
16 - Insert a wooden dowel just shorter than the total height of the cake into the centre, push it all the way through both cakes until it reaches the base. The top of the dowel should sit slightly beneath the top of the cake so that it is not visible.
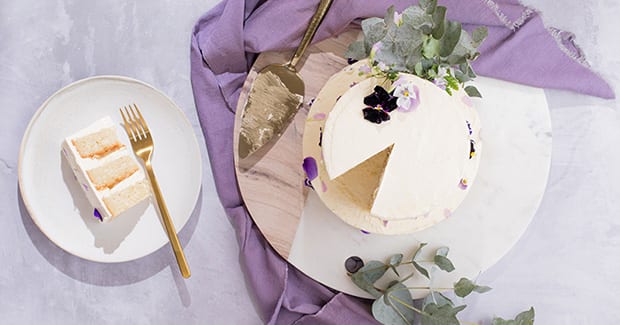
17 - Cover the whole cake in another layer of the buttercream. Decorate with fresh flowers, sugar flowers or other decorations as desired.