The lid and the bowl need to be locked in place for the machine to operate. Check firstly that the bowl is interlocked onto the unit - the handle should be at the front right, and clicked into place. The lid should also be locked in, with the feed tube facing front on.
You can store the chopping knife blade, dough tool and emulsifying tool in any order, over the tool shaft. These don't lock on, but will simply sit on top of one another. One disc can also be stored on the top of the tool shaft, just under the lid. Any other tools (e.g. blender, citrus juicer and any additional discs) will need to be stored seperately.
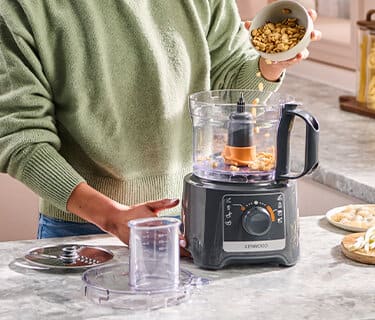
For using the chopping knife blade, dough tool and emulsifying tool: Put the drive shaft onto the base unit and then lock the bowl in place. (Outside the bowl) Using the finger grips for safe handling, choose your tool and drop it over the tool shaft. You can twist the tool to lock it into place. When handling the chopping knife blade in particular, be careful as the blades are sharp. Place the tool shaft over the the central part of the bowl. Add your ingredients and then lock on the lid.
You'll need the bowl, drive shaft, tool shaft, 2-in-1 slicing/grating disc and lid. To assemble: put the drive shaft onto the base unit and then lock the bowl in place. Lower the tool shaft over the the central part of the bowl and then place your disc over the top of the tool shaft. For grating, ensure the side with grating holes is facing upwards (towards the lid). To slice, ensure that the side with raised grating holes faces downwards (towards the base) and the side with the raised slicing blade faces upwards. Lock on the lid and turn on the unit. Now add your ingredients through the feed tube, use the pusher to guide the ingredients down the feed-tube. For the best results, use fresh ingredients and do not pre-cut food too small. Fill the width of the feed tube to prevent the food from slipping sideways during processing, this will create an even slicing/grating result.
Simply assemble the blender to the base unit, by twisting to lock in place. Note that the blender must be locked in place to operate - the handle should face the front right corner. You can add your ingredients and lid either before or after assembling the blender goblet to the unit. Now your ready to blend!
If you want to know more information about your stand mixer, please check our Manual that offers more in depth information on how to get the best from your machine
If you want to know more information about your stand mixer, please check our Manual that offers more in depth information on how to get the best from your machine